
This week one of my photos was featured as one of the Top 5 for The Snap Society “WEEKLY FAVORITES” photo challenge chosen from Instagram.
Look, I even got a fancy badge for it!

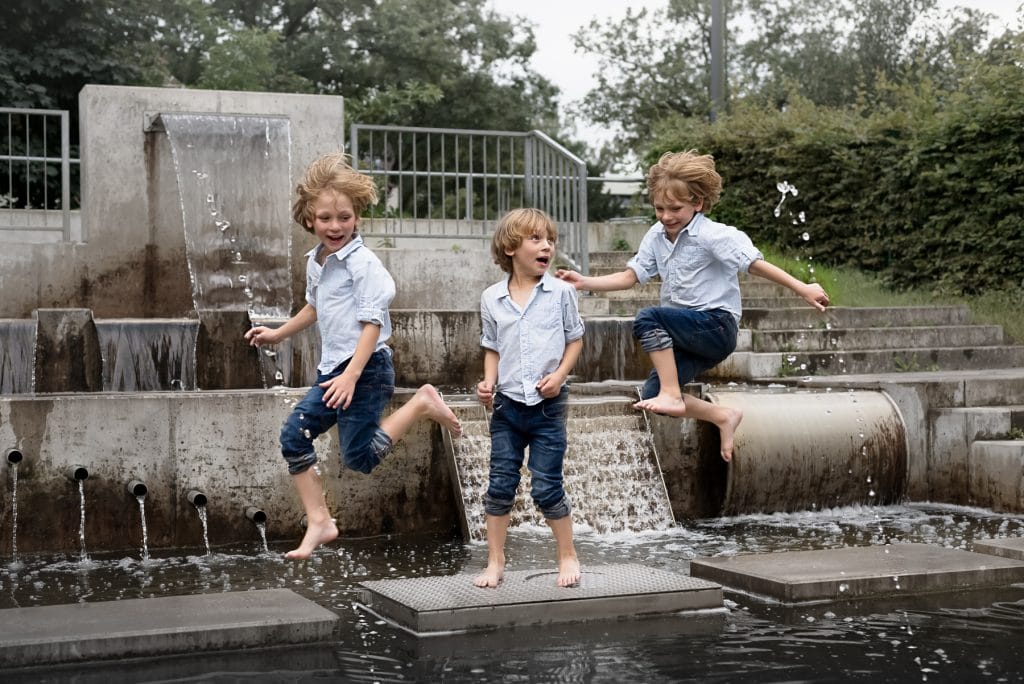
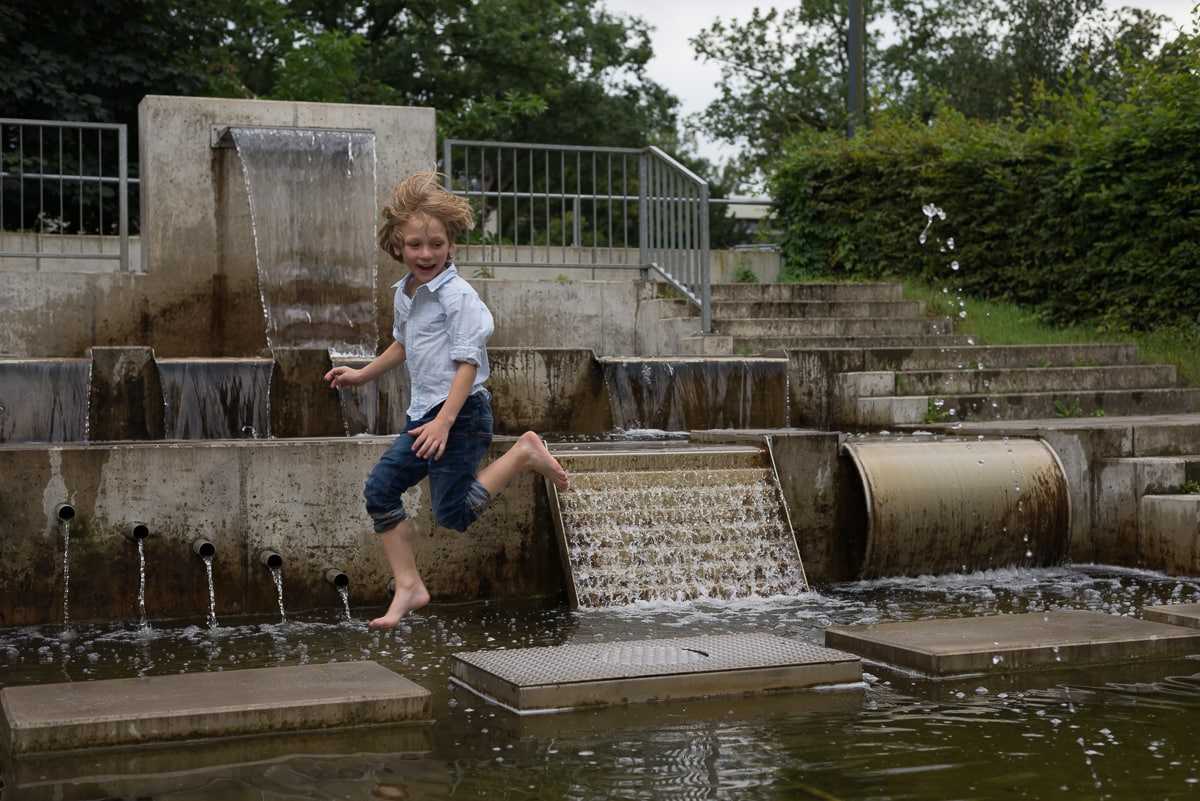
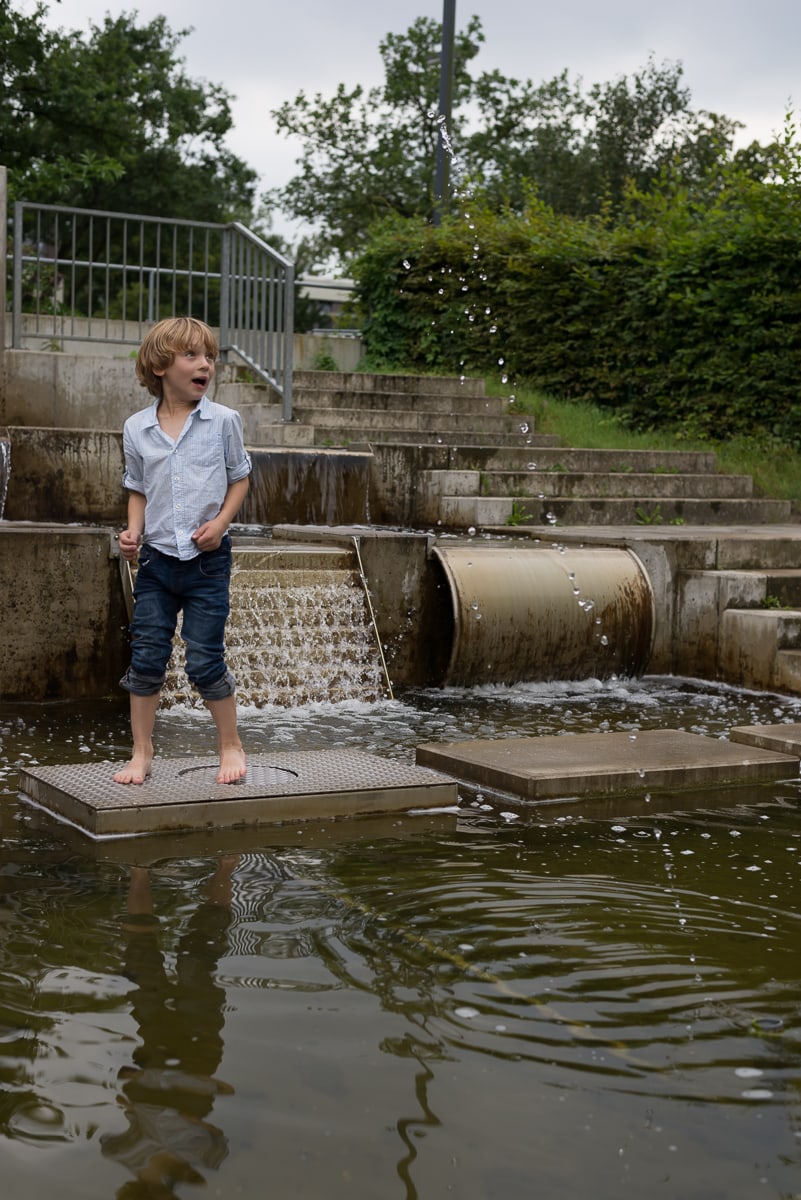
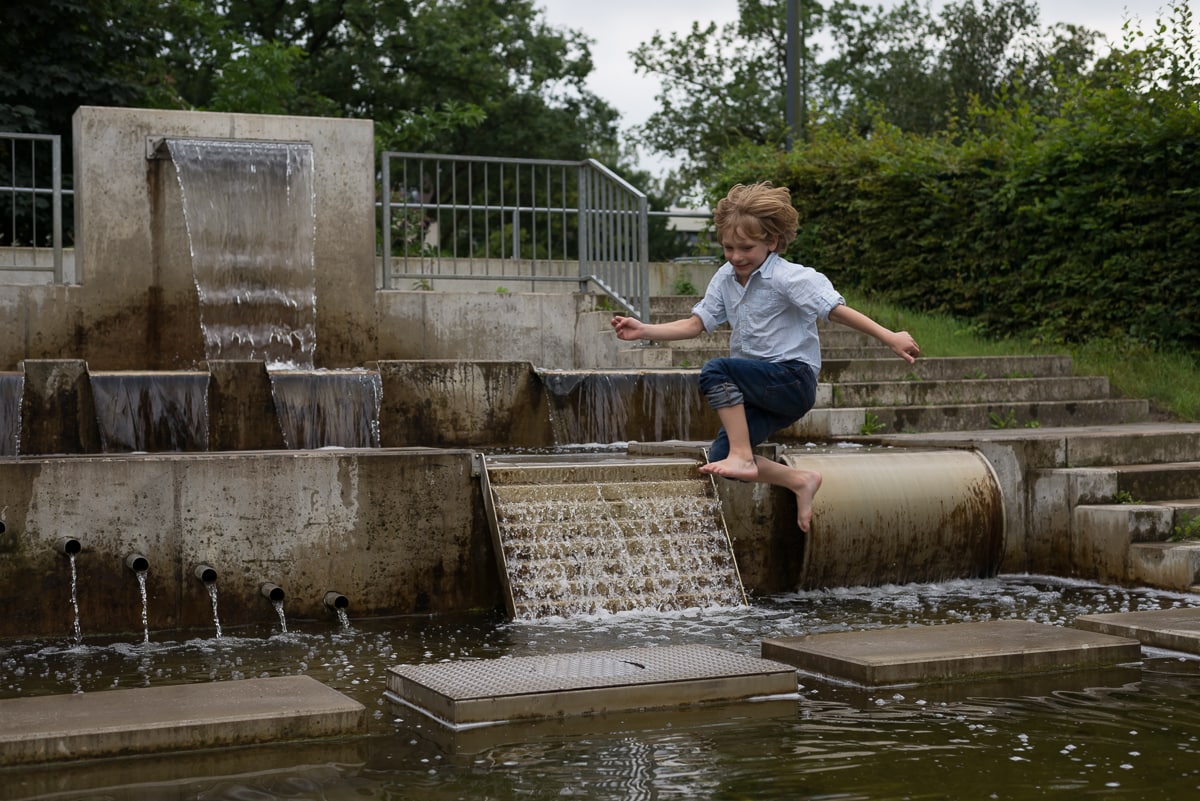
Now you might wonder if these boys are identical triplets but, of course, they aren’t (although that young man can certainly cause chaos and mess for three!!!). This particular image is actually a composite of three images. That means that I had originally taken three separate images and then combined them in Photoshop. I thought, this might be a good starter to show you a little bit about how useful (and fun) it can be to combine images in photoshop, creating composite images.
When I first started out on my photography journey I felt that I would never have to deal with Photoshop as I didn’t want to change my images too much and using Photoshop felt like cheating. But when I got to know it better during my National Diploma Course in Photography and the Kensington and Chelsea College, I was immediately fascinated! I loved to create ‘new pieces of art’ and considered Photoshop a tool to create what I imagine. Maybe like scissors and glue, cutting and pasting. My series ‘Altered Reality‘ was created during that time and I still love it!
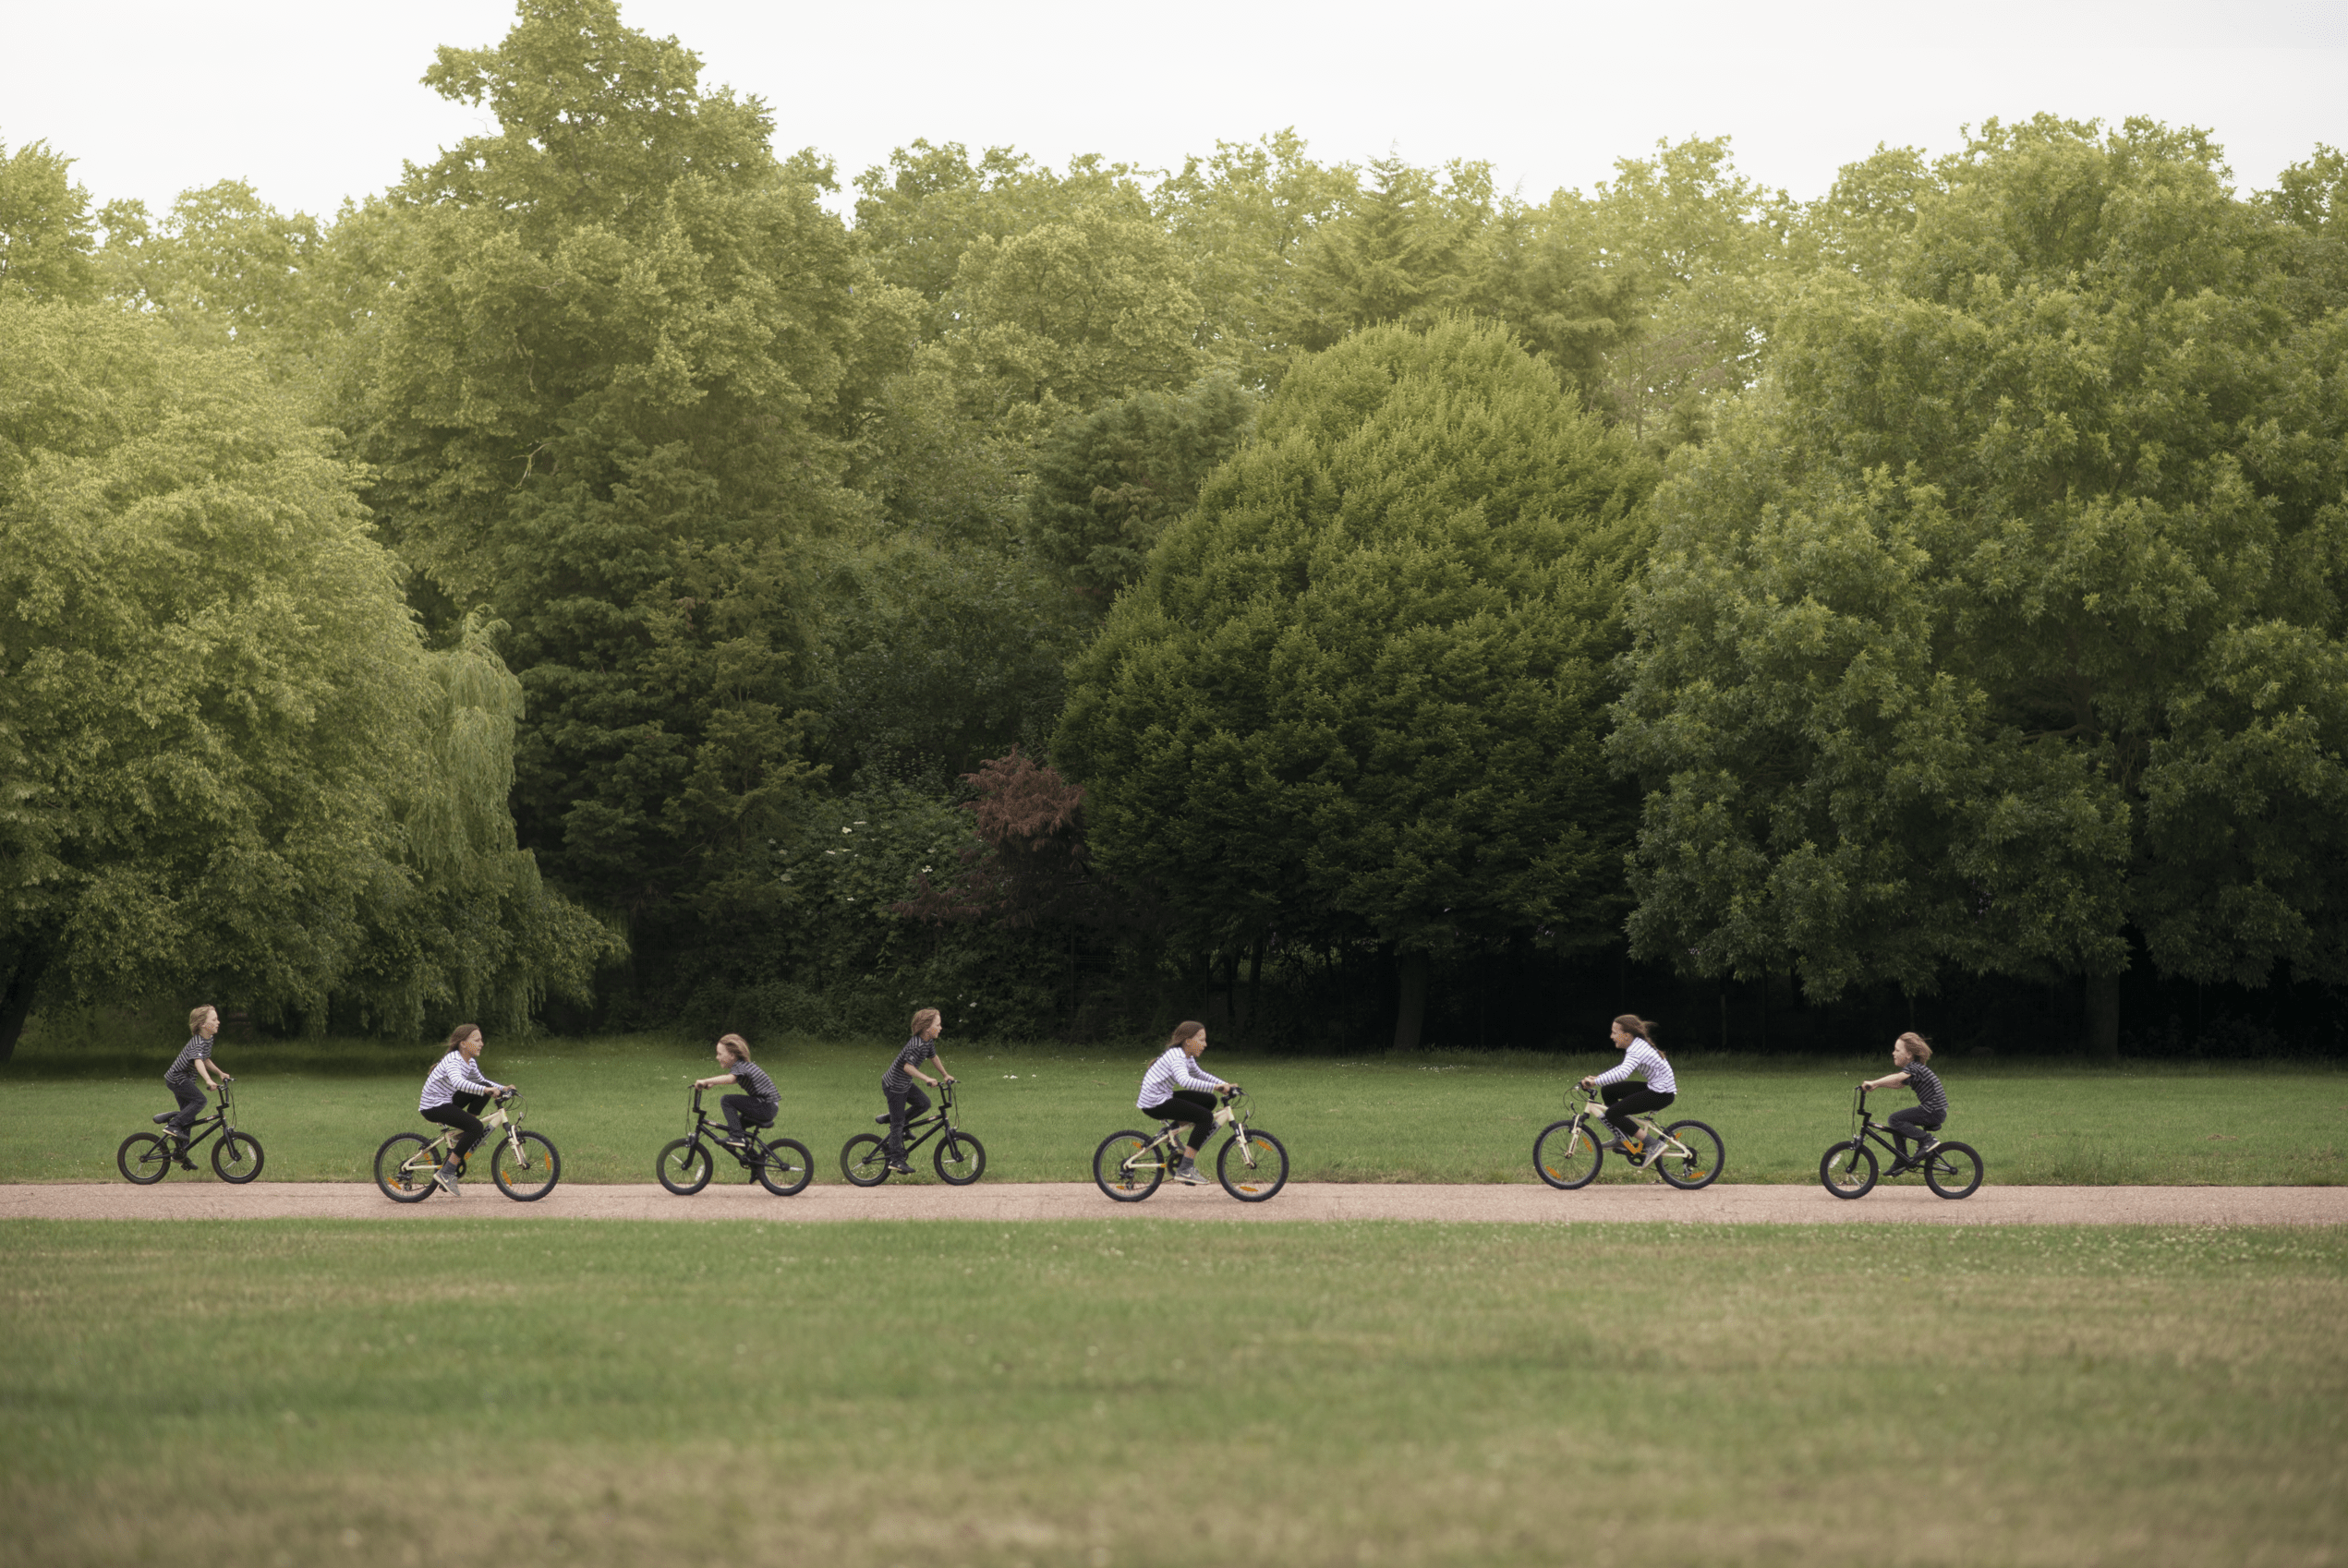
To create a composite image in Photoshop, you have to choose one image as your background. And onto that background image you can stick parts of other images. If you want to make it look like this was actually taken in camera (like there are actually triplets) and NOT like somebody has cut and pasted something from a different image into your picture, then it helps to start with images that are as similar to each other as possible. With the ‘triplets’ above you can see that the first and third image are taken from a very similar angle, the middle one is not so ideal as the angle of the backdrop is different, but it is still the same light, colours etc. Ideally, if you are planning to combine some images or pieces of different images, you should leave your camera in the same position. I show you and example of a fun image I did with my children a few days ago in Roundwood Park.
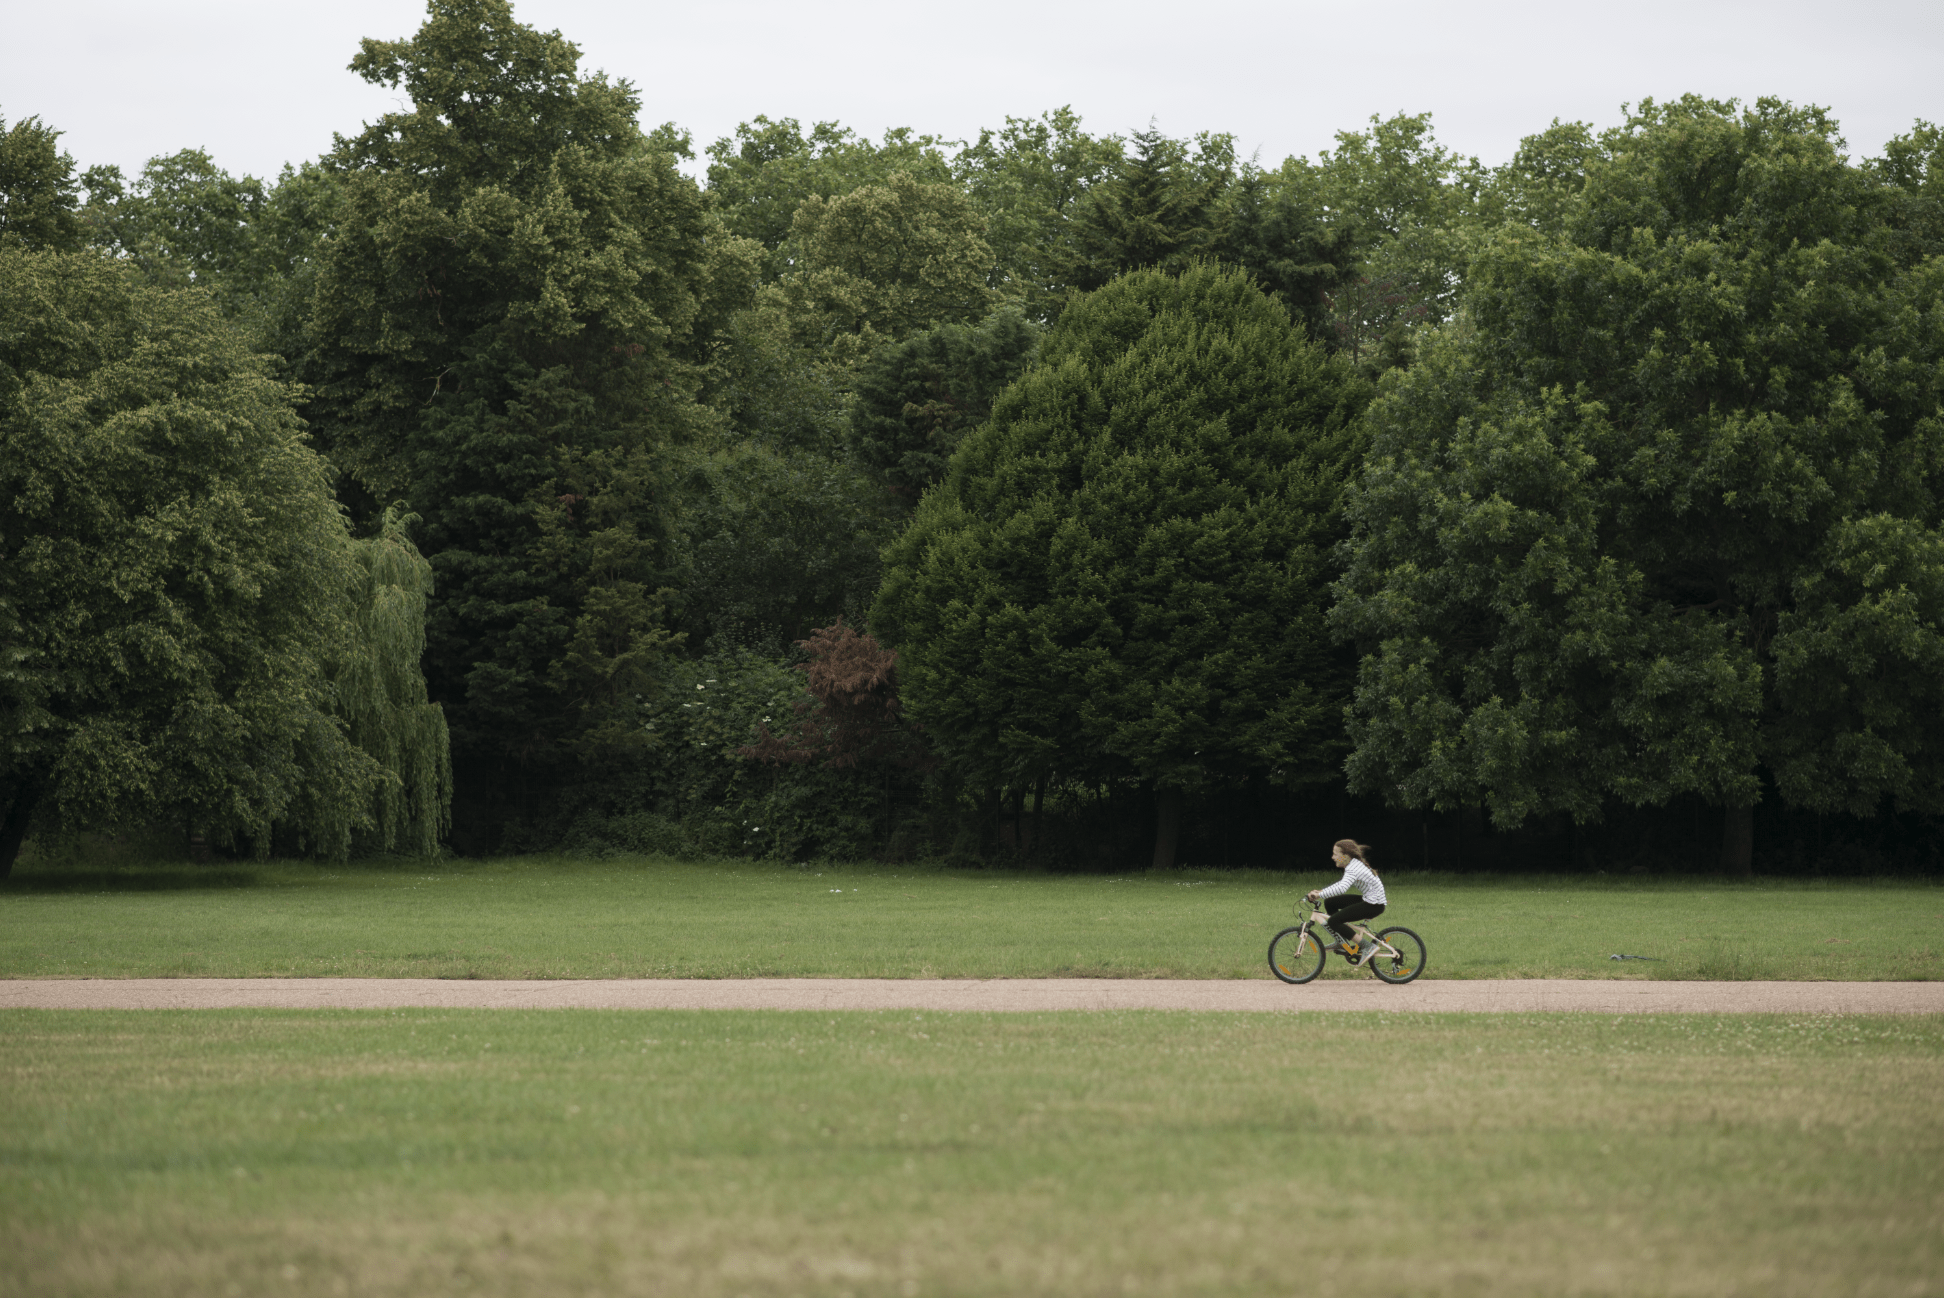
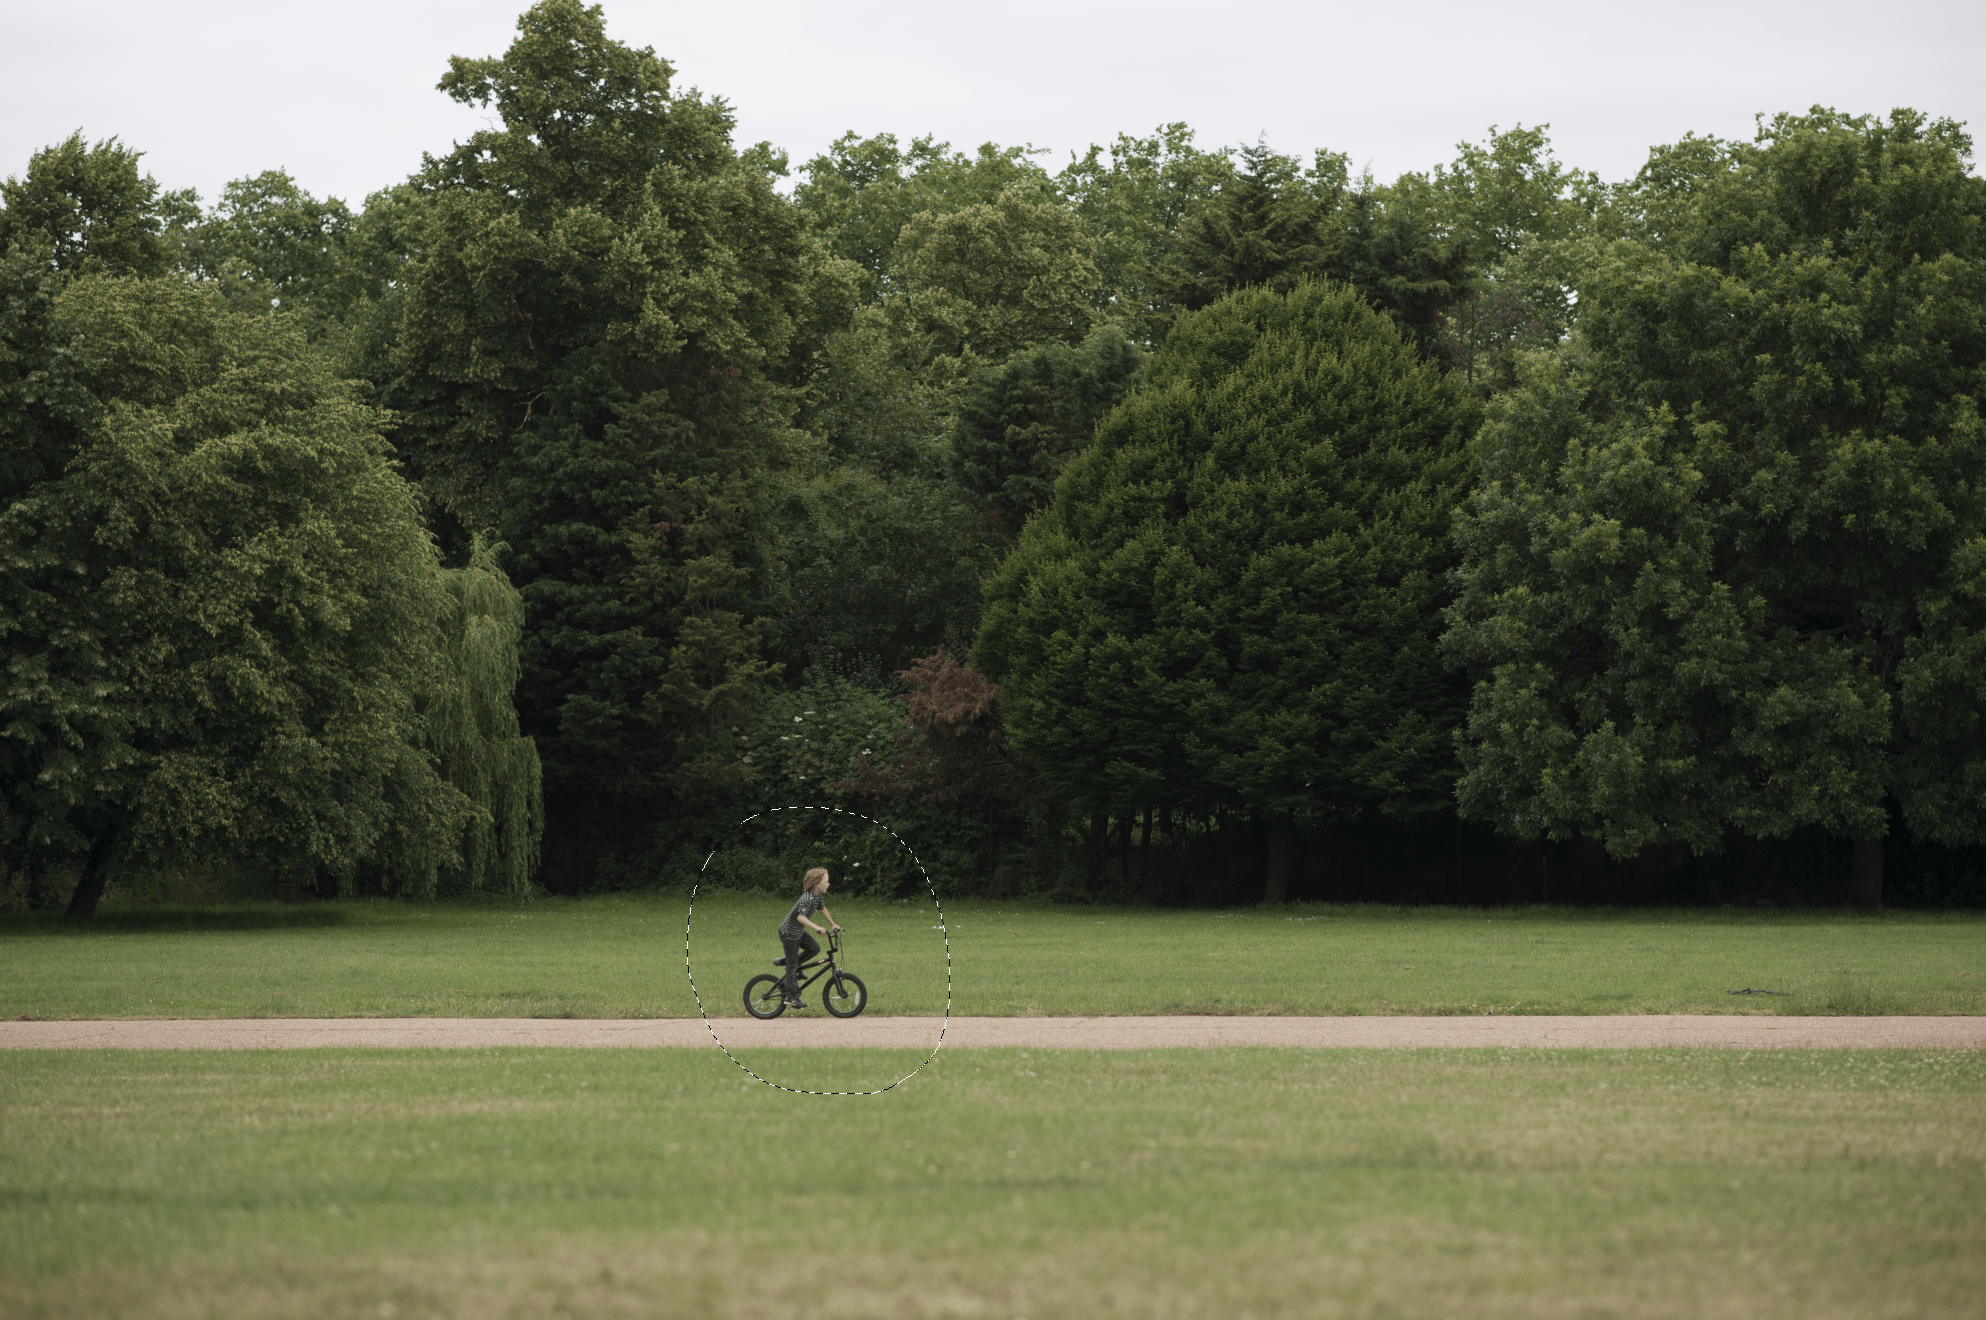
I chose the image with my daughter cycling left as the background image. Then I opened an image with my son cycling right and selected him and a bit of the area around him. It really is like cutting him out of that picture.
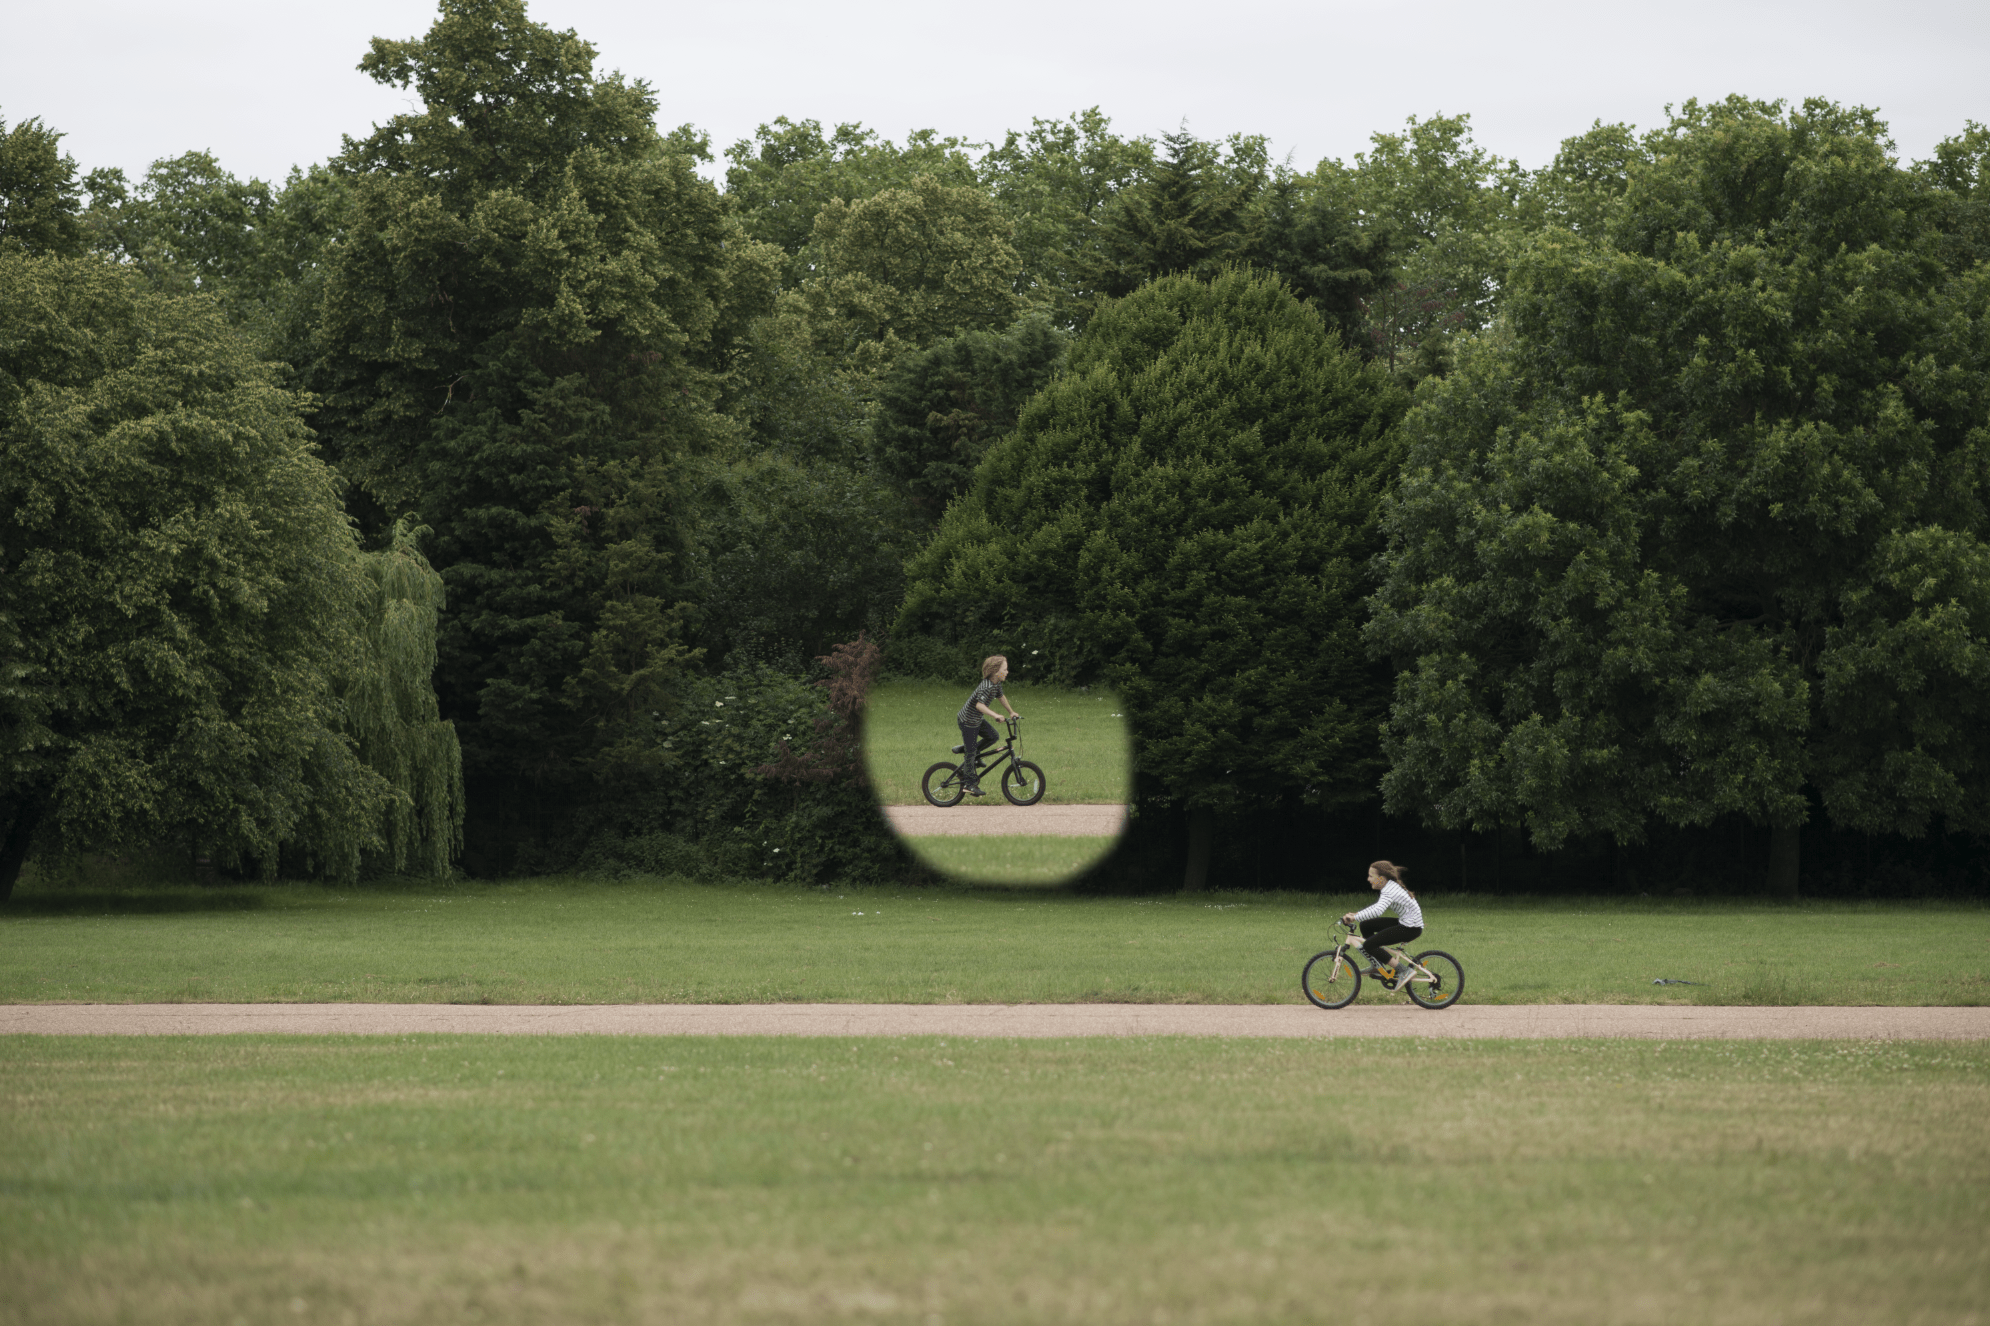
I just had to positing that little cut out and stick it onto the background image. There are ways to make the edge of the cut out as smooth as possible, but in an image like this, you almost don’t have to do that.
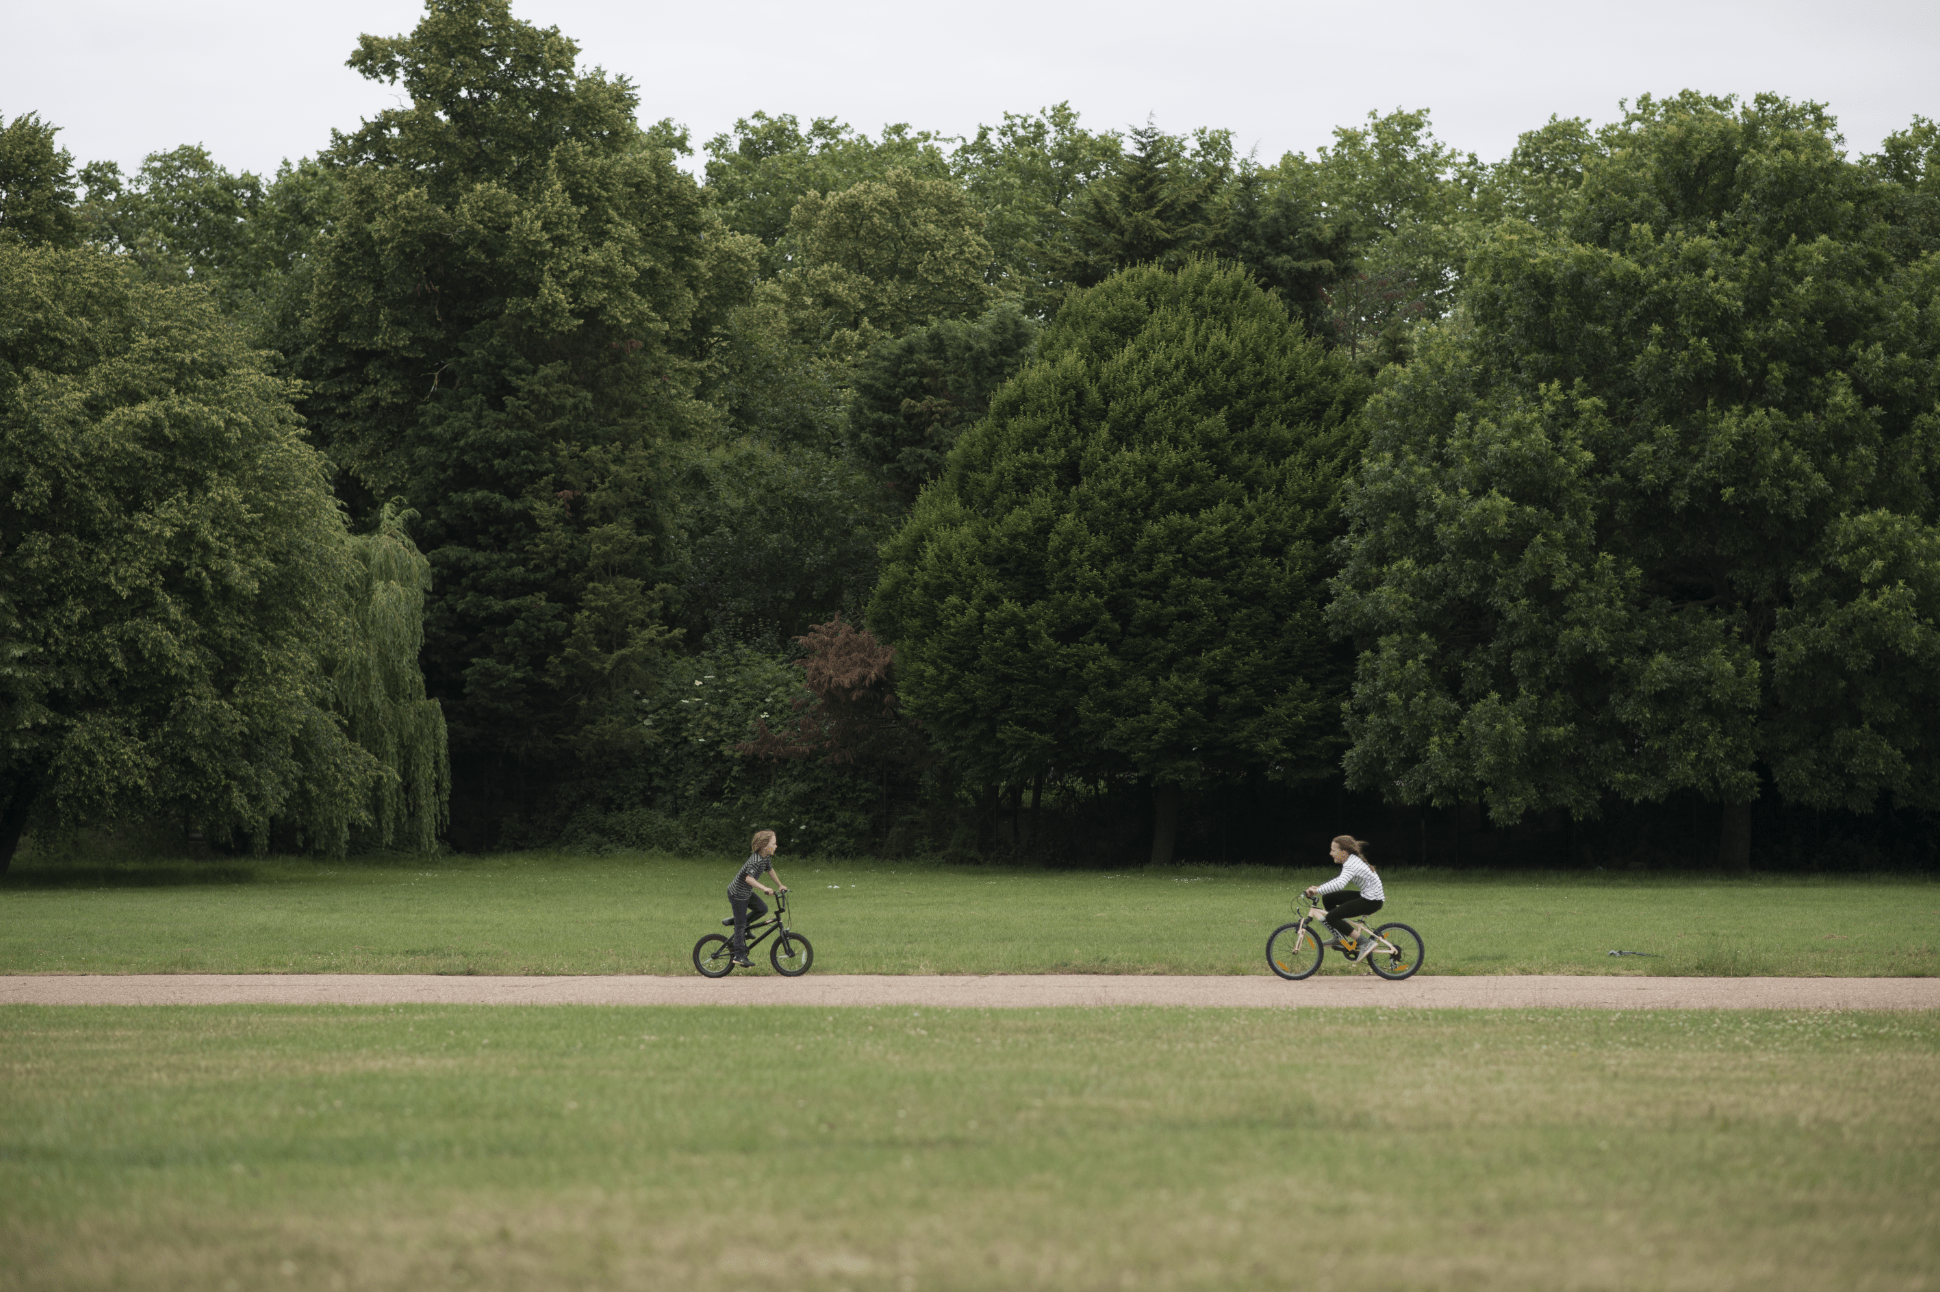
I then repeated that same procedure again and again, until the the path was filled with speeding cyclists that have hopefully released enough energy to give us a quite evening.
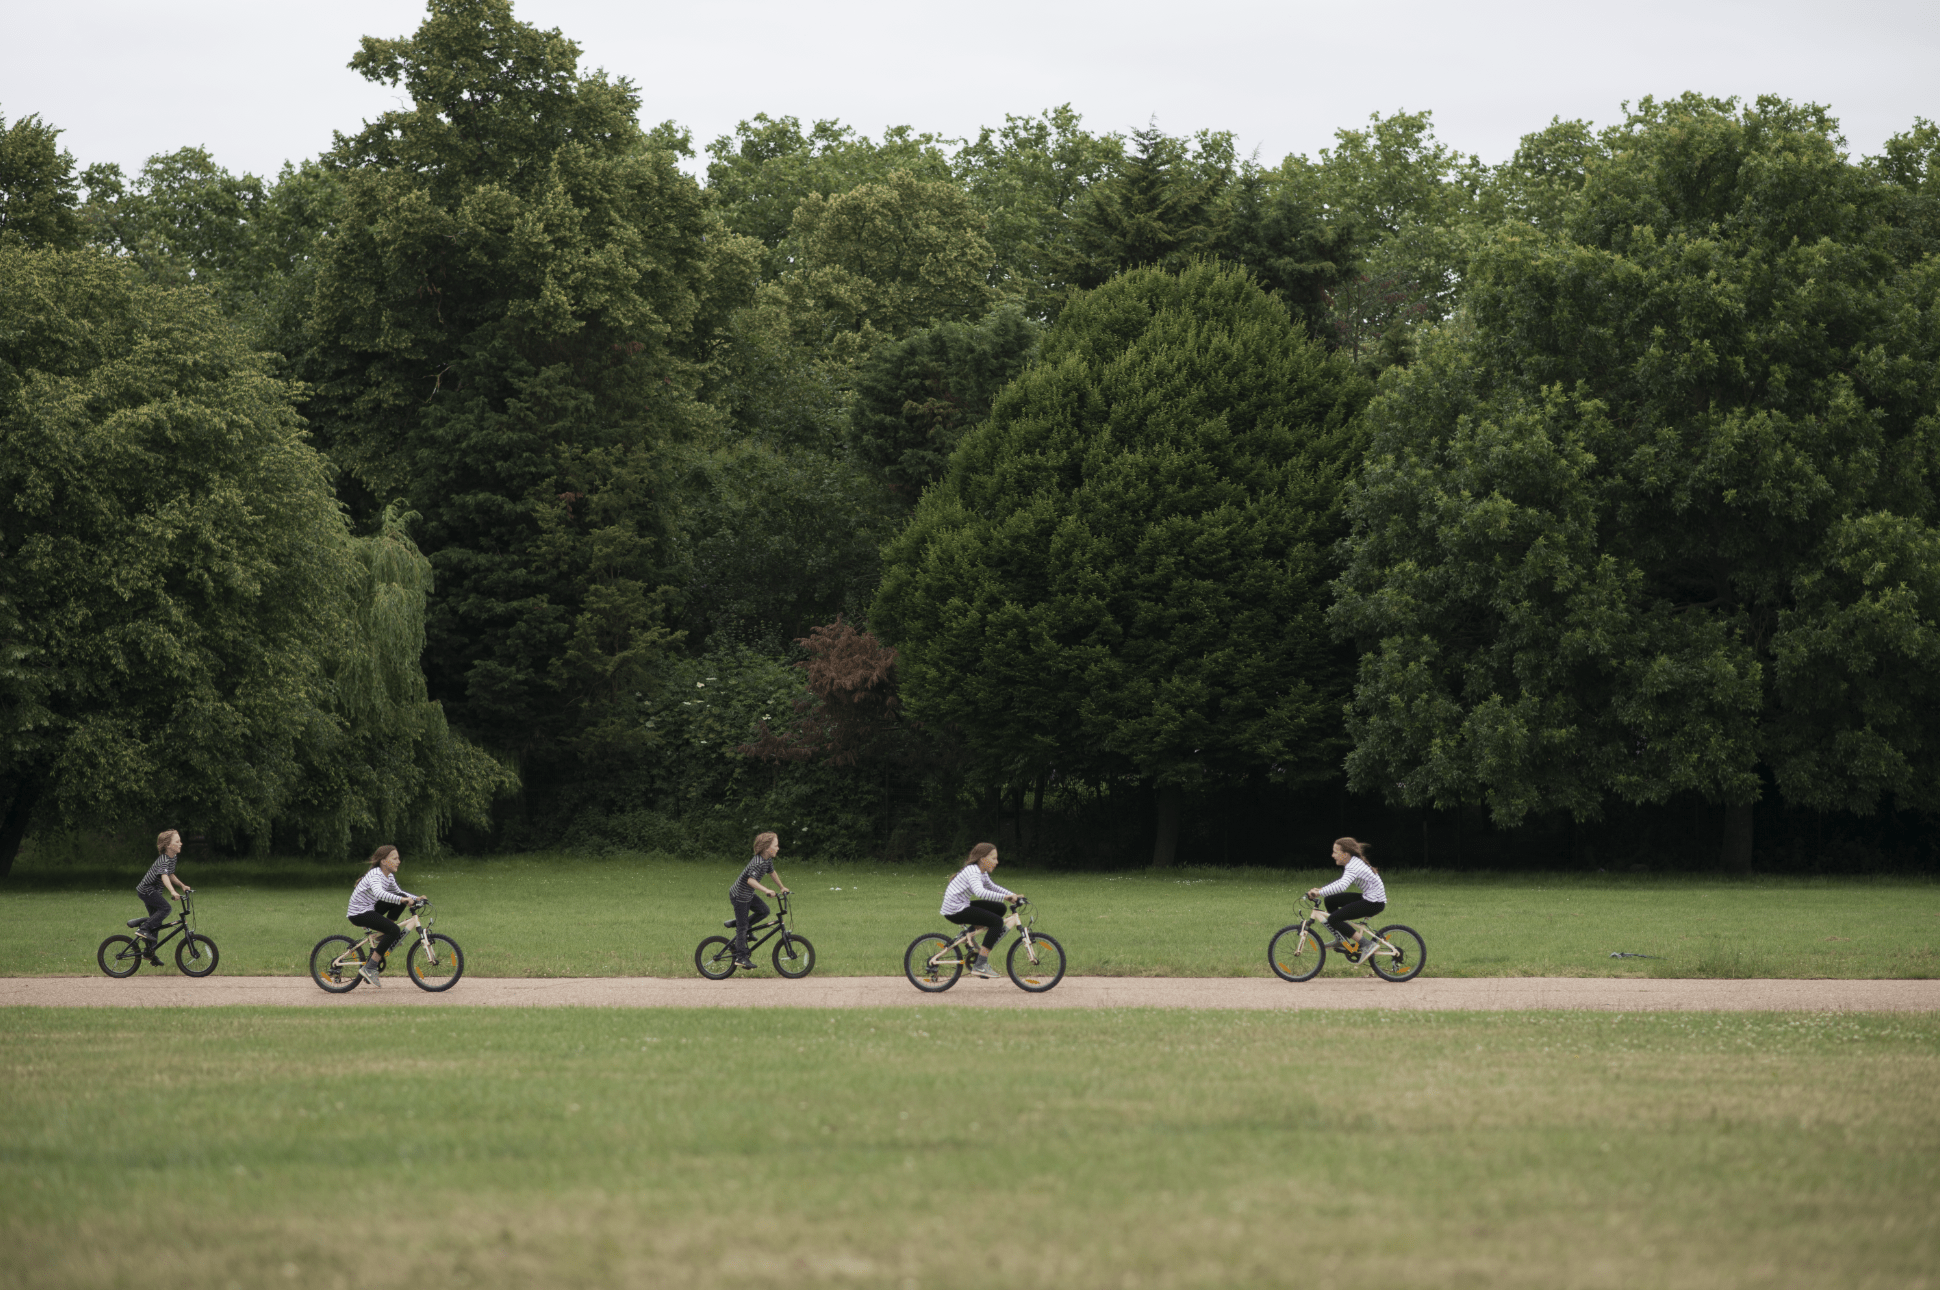
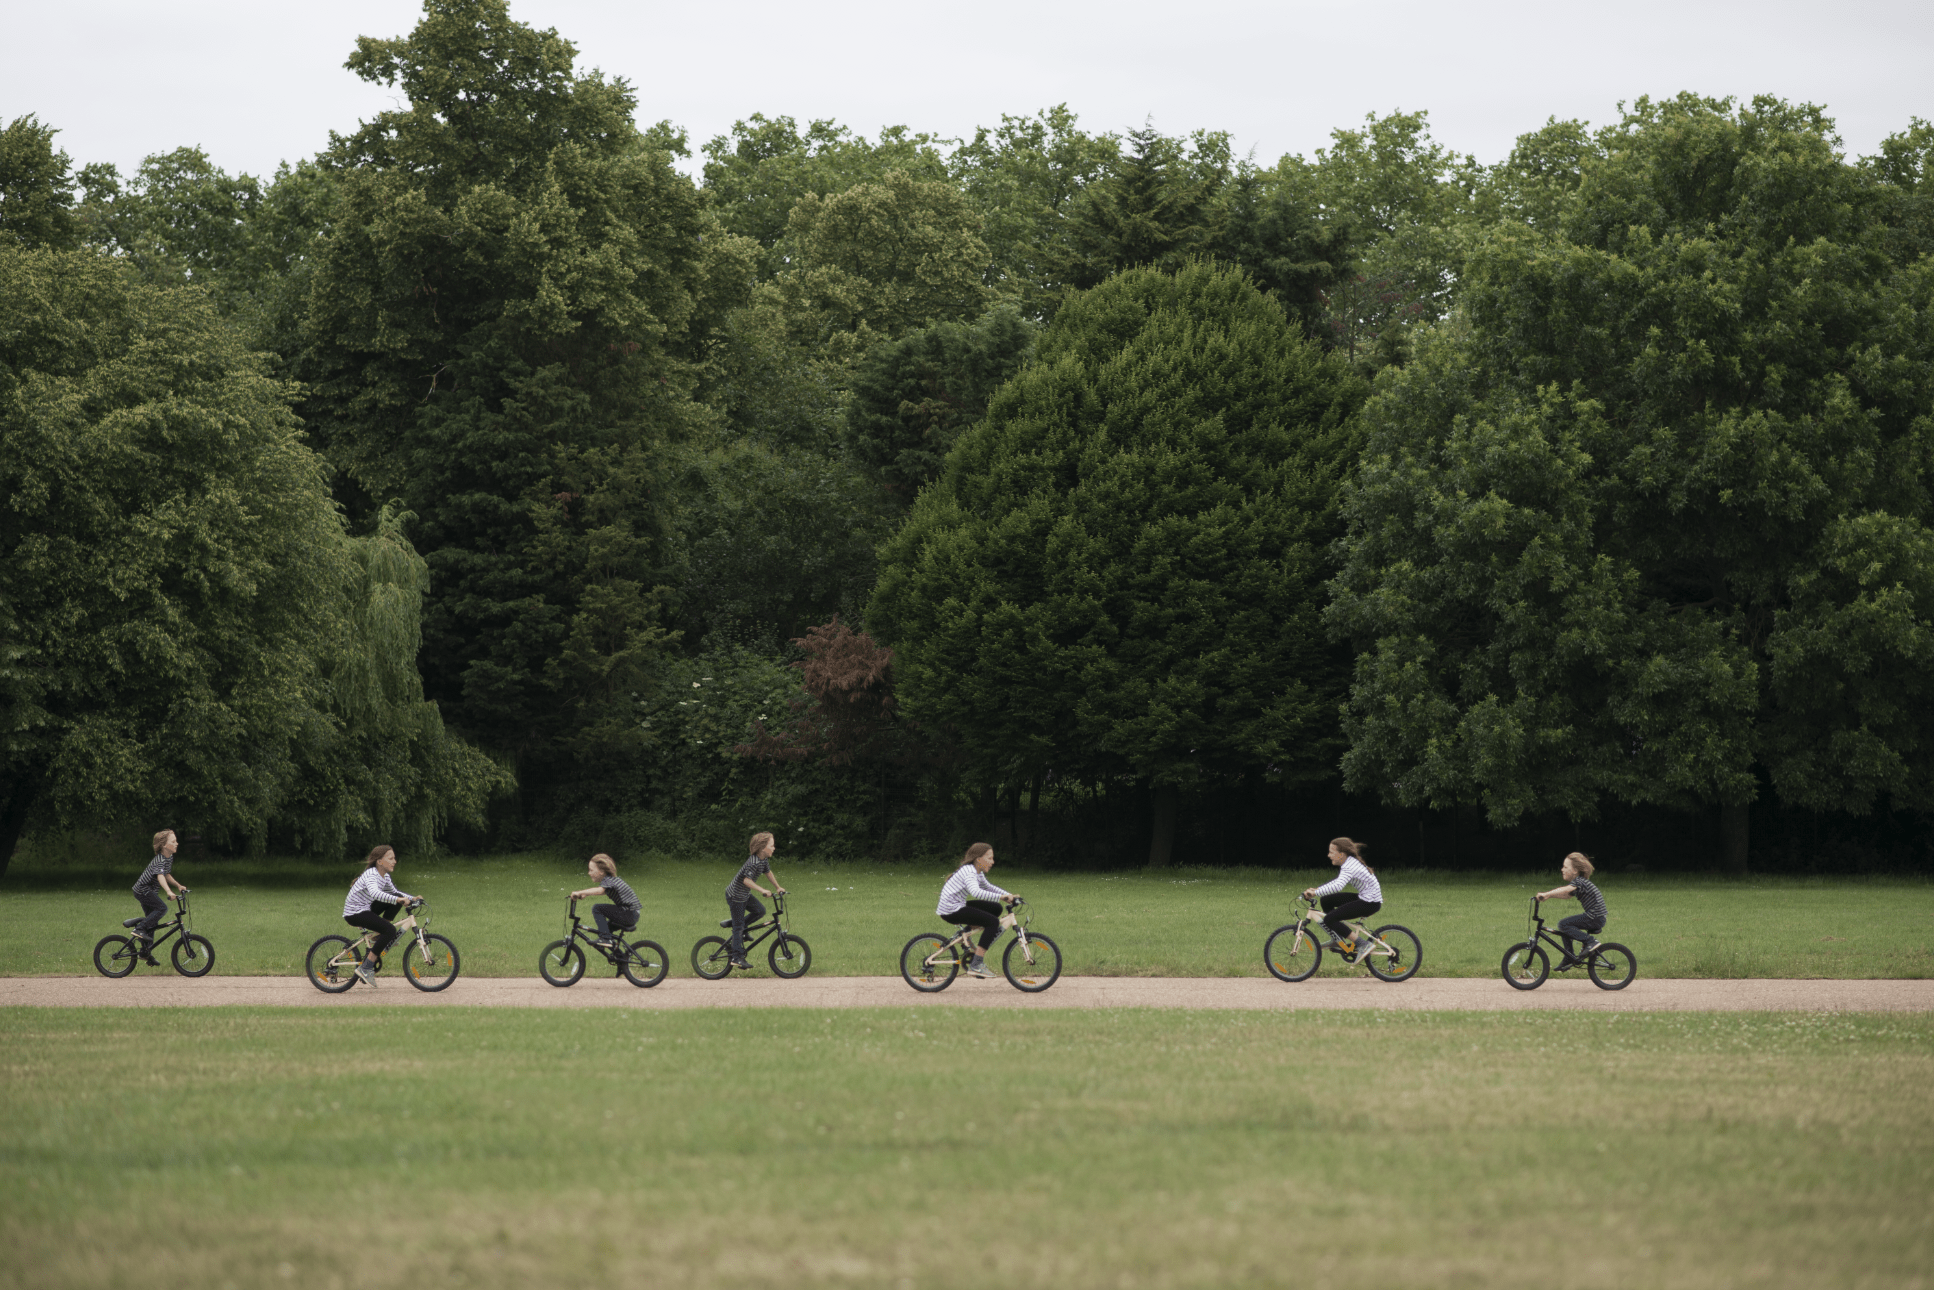
The final image still looked a little dreary, so I adjusted light and colour – et voilá! A fun image from an evening in the park that sums up pretty much what the kids were doing most of the time.
Of course, this is just playing around. But as a child photographer in London, I do need this technique once in a while. Not so often in the studio, but when shooting on-location there can easily be distracting elements in the frame that you couldn’t avoid when you took the image and you really don’t want to miss the moment either. So you take the image with the distraction anyway. And one way to get rid of it is exactly what I did with the bikes: When the distraction is gone, take another picture from the same angle, in the same light and combine them later.
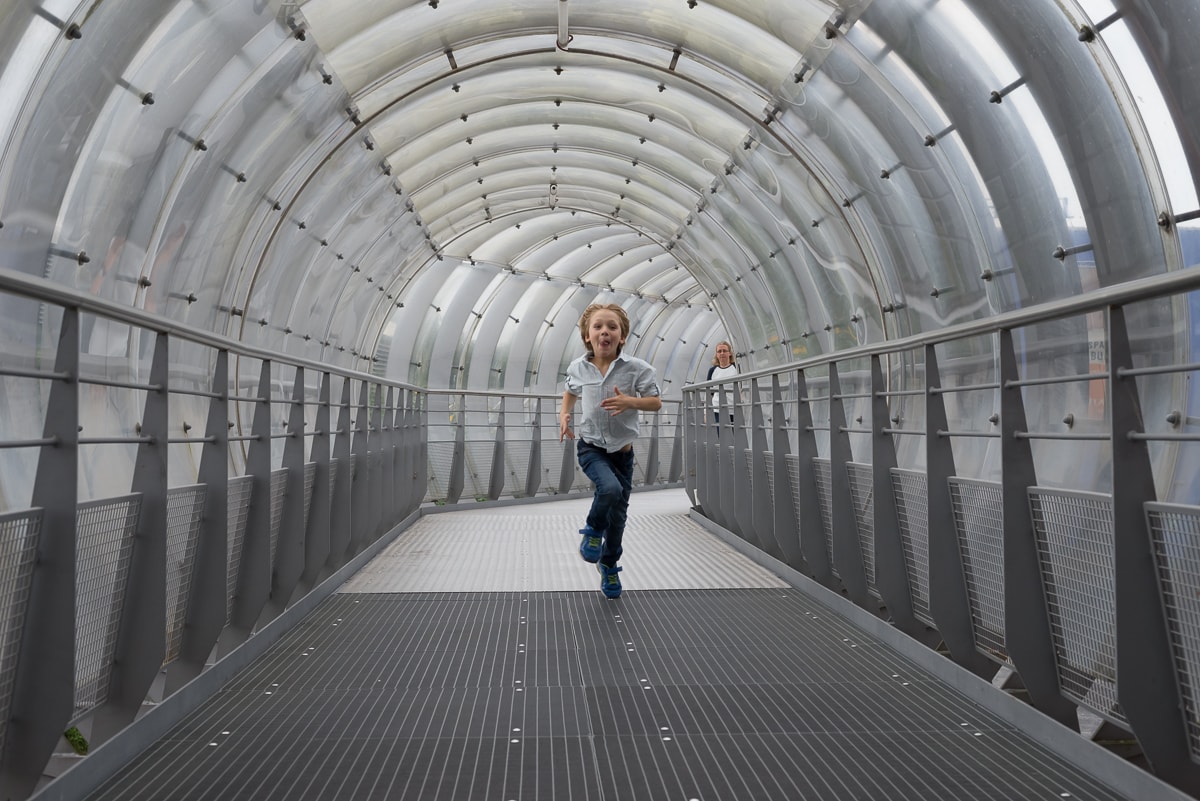
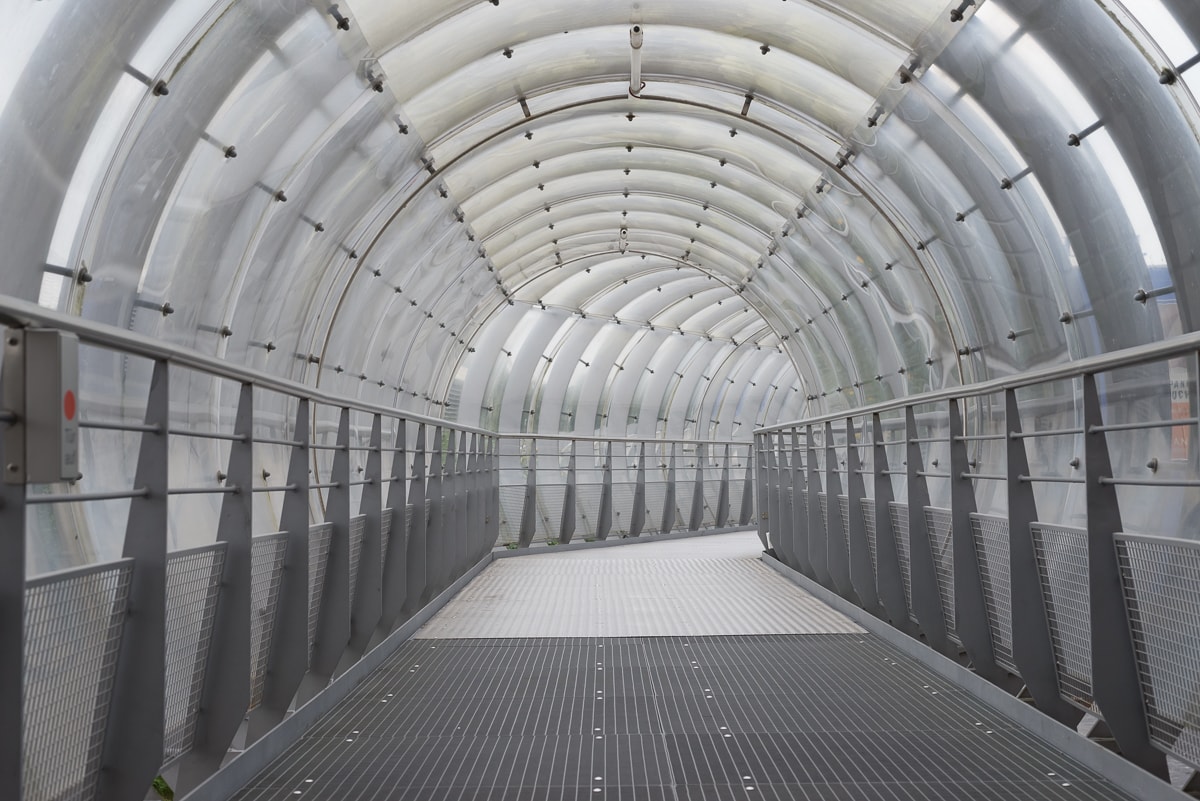
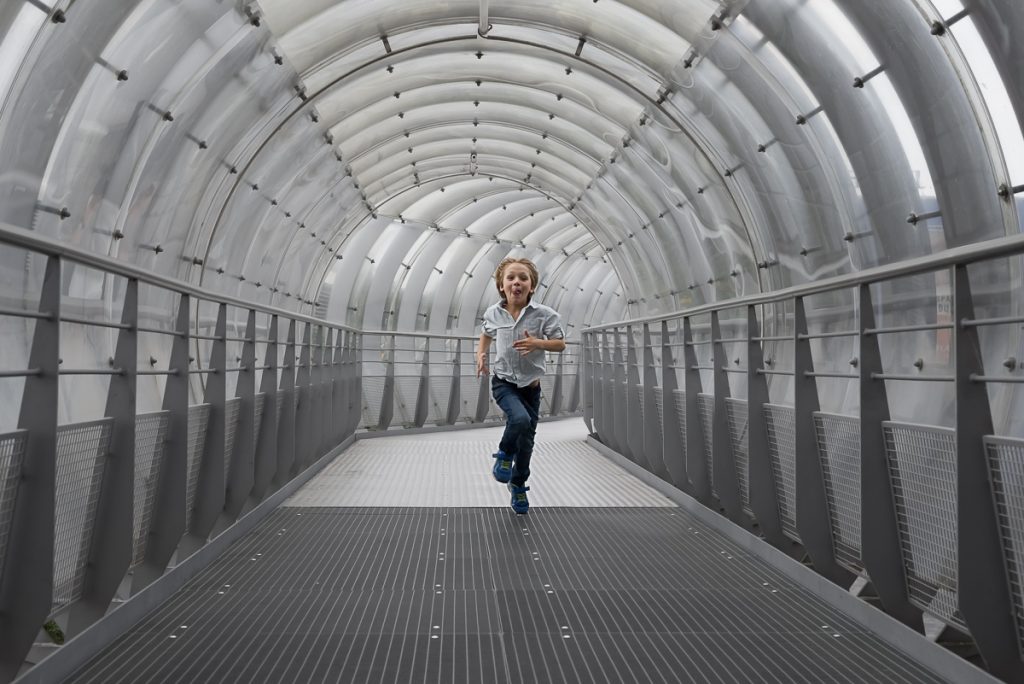
One example is this one. Most often you only have one chance to get the genuine image of what a child is doing and enjoying. Here, my son ran towards me, full of joy and energy and I wanted to capture that. Unfortunately, I could still see someone in the background which obviously really impacted the image. I took the picture anyway. Believe me, had I asked my son to wait or to run again when no one is around, he would have moaned or just refused. So instead I waited for the other person to leave (my son was obviously gone as well by that point…), I didn’t move and just took another picture of that hallway without anyone in the background. As long as the corner where the person could be seen in the first image was empty, that was good enough. The rest of the image could have been heaving with people. In this case the hallway happened to be empty. (Why not 10 seconds earlier? It would have saved me some time…) Then I cut out the empty corner, stuck it over the person that could be seen and there we go – a clean image without distractions!
Another good use of composite images is when I photograph a group of people (sometimes even just two!) Especially with children it can be very hard to have them all look at you at the same time. I obviously try, but often their sweetest expressions are not all on the same image. Here I come again with my digital scissors and glue and choose what I need to get one image that shows everyone to their best.
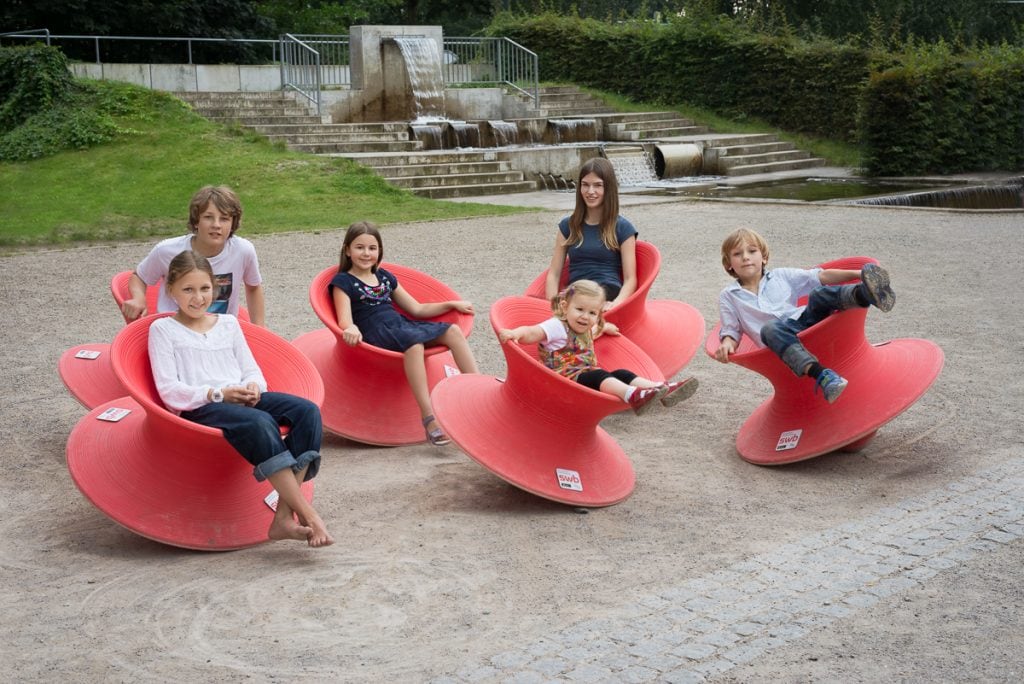
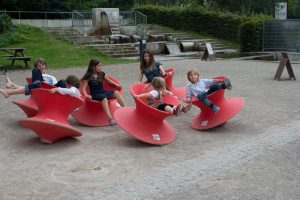
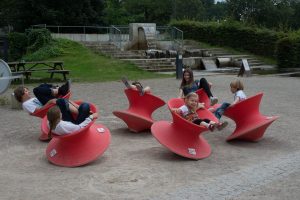
Guess how easy it was to get six children (of which some are really tired of being photographed too much by their mum) look at the camera at the same time while seated in some awesome moving, spinning play equipment kind of chairs! No chance! But the good old composite technique in photoshop was a fantastic helper once again.
Pingback: Skatepark photography in West London - Outdoor sport photography