Recently, I’ve been trying out alternative processes. I didn’t know there were so many ways to print images outside of the darkroom and without a printer!
Initially, I was at a complete loss, what to do but then I discovered the website alternativephotography.com that introduces many techniques and processes. Also, the book Experimental Photography: A Handbook of Techniques is a very good and interesting read.
I decided to start with processes that seemed easy to achieve in my own home. The sun was out (which is not too often the case in London) and I didn’t have a chance to shop for any chemicals and other ingredients. So my first choice had to be Anthotypes and the Chlorophyll process. Both work on the basis that plant extracts and chlorophyll change in the sun.
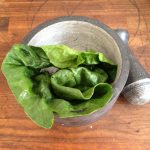
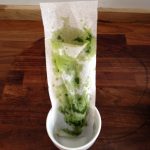
In Anthotypes you basically cover paper (or fabric) in natural plant extracts and expose them as a contact print in the sun. That’s all. No developing, no washing, no fixing, no chemicals. So I rummaged through my vegetable drawer and decided to use up some fresh spinach and some limp raw beetroot. I cut them up and squeezed them with pestle and mortar with a bit of rum (the only higher percentage alcohol I could find). Then I strained them through a tea sieve. Apparently, you could add just water or even oil instead of the alcohol, but I didn’t try that.
Then I brushed the ‘emulsion’ on paper and fabric and let it dry in the dark. As soon as they were fully dry I placed objects and negatives ( I did not have any acetate at that point) on them, covered them with a glass plate and put them out in the sun.
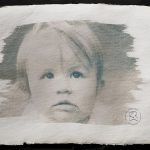
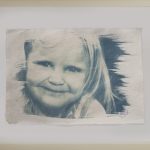
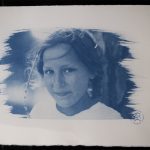
After a whole day in the sun I had quite good results. The exposed areas were bleached by the sun whereas the covered areas retained most of their colour. The photograms worked really well, the negatives were too detailed and didn’t really show. Also, it was easier to print on paper than on cotton fabric. Oh, and I realised that whatever you use for a photograph needs to be really flat. That way the glass plate can sit better on the paper and also the sun will cast tiny shadows that move with the different positions of the sun and hence blur the outlines a bit. Also, with this process it is better to work from positives as the exposed areas become lighter and not darker as in most other processes. You can use any kind plant products, from spices over flower petals to fruit and vegetables and they will result any many different colours from yellow over pink and green to purple.
Parallel to that I decided to try an even easier process (or so I thought). For the Chlorophyll process you print directly with and on a leaf. All I had to do was to put a negative on a big enough leaf and sandwich them between two glass plates ( or in a contact frame) and leave out in the sun. Saying that, there are artists who produce incredible images through this process. Binh Danh, for example, printed in his Immortality series images of the Vietnam War into and onto the leaves of tropical plants. Ackroyd and Harvey use Chlorophyll for huge and very impressive images.
I tried two different leaves. One was my spinach, again. I placed it on a mirror (for lack of more glass plates) and covered it with a glass plate.
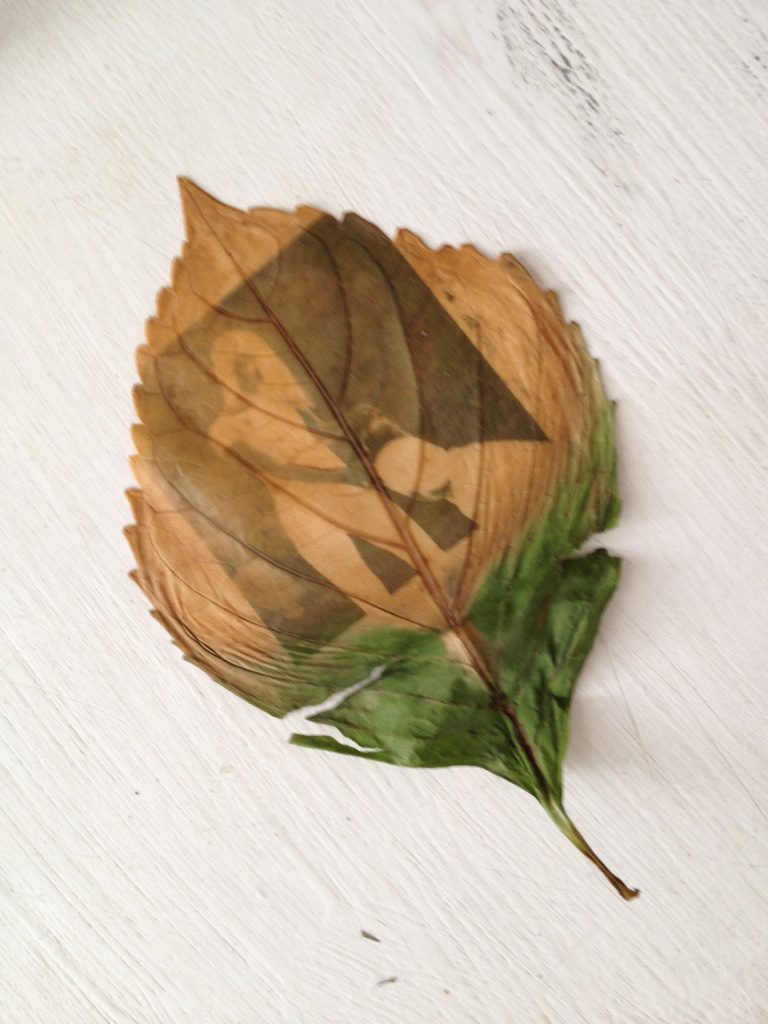
For the other one I used a leaf of hydrangea which I sandwiched between two glass plates. I let part of the leaf stick out to be able to ‘feed’ it some water. I had read that this should be done, but it was really difficult to do and even after I gave up, it didn’t seem to do the leaf any harm.
I left them outside in the sun for what felt like forever. I moved them with the sun to get as much exposure as possible. After about 3 days I started to see a picture on the hydrangea leaf. This is when I realised that using two glass plates was really handy as I could see the back of the leaf easily without moving the glass plates or negative and the exposed image did show through the leaf. Again, a positive transparency would have worked better as the exposed areas become lighter.
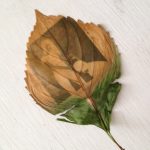
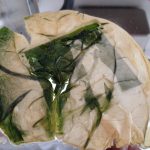
Also, the hydrangea leaf worked much better as it probably does not contain as much water as spinach. It looked like it dried between the glass plates, with most of the leave turning brown and the image showing in black. At some point I thought it might be part of the negative emulsion being transferred onto the leaf… The spinach leaf however, gently cooked during those days in the sun until it was quite soggy and smelly. When I tried to take the glass plates apart it was very delicate and tore very easily. I decided to just leave it on the mirror to dry and then try and remove it once dried. Didn’t work. Most of the leaf just stuck to the mirror and tore when I tried to remove it. And the smell!
Both processes were fun to try and did not involve much hassle or mess. They are probably great to do with kids although waiting for the image to develop might exceed their patience…
Another drawback certainly is that the images will fade. As there is no fixing and the emulsion reacts to UV light, the images are not really suitable for display. You could always take a photograph of them, of course. Or just keep them in an album…
I certainly got a taste for experimental processes and will happily share my experience with you!