
I have always liked to experiment with photography. That’s where my love for cyanotypes stems from. Unfortunately, in my day to day life I often lack the time, the opportunity or simply the drive to experiment, because this is “just for fun and not for a specific purpose”. I enjoy it so much and it relaxes me, so that should be reason enough to make some room to do it, but often it needs a little push from outside to actually try something new and different. For that reason I regularly join a photography meeting at Queens Park Photo Group. The other members are no child photographers, many are no professional photographers but all are enthusiastic about photography and like to be creative. You wouldn’t believe the ideas others come up with. From experiments with expired film, chemically or physically destroyed polaroid images to close ups of everyday objects (sometimes as mundane as a wet shower screen) that turn them into abstract forms and shapes. It is incredibly enriching and inspiring.
For a while we did image chains. I loved them! They worked a bit like Chinese whisper, with one person starting with an image and the next taking an image as a reply/ and association to that one, then the next person replies to the second image and so on. It’s fantastic to see where that leads.
At the moment we try to shoot images that relate to a certain word or theme. Last meetings theme was glass. And as we were on holiday in Wales just before that, I decided to bring my crystal ball to experiment with it. This was probably the only ‘glass option’ I had, because we tend to avoid anything glass on a camping trip with three kids… Although the car windows, the sunglasses, the empty nutella jar would have all been a starting point.
Anyway, here are some of my images and learning points when shooting some crystal ball images. I had dabbled in crystal ball photography before and read some articles like this one. Originally, I had a very small one with a diameter of about 40mm but it was really hard to get a nice image with it. I had to go in very close with a macro lens and wasn’t happy with my images. When I saw a crystal ball at paperchase in 70mm I had to get it and try again.
The problem (or the beauty?) is, that the images you take through the crystal ball will be upside down. You can either live with this or flip the image afterwards (which turns the background upside down). Also the image inside the crystal ball will be distorted, so you should look for an object that benefits from it. Faces usually don’t.
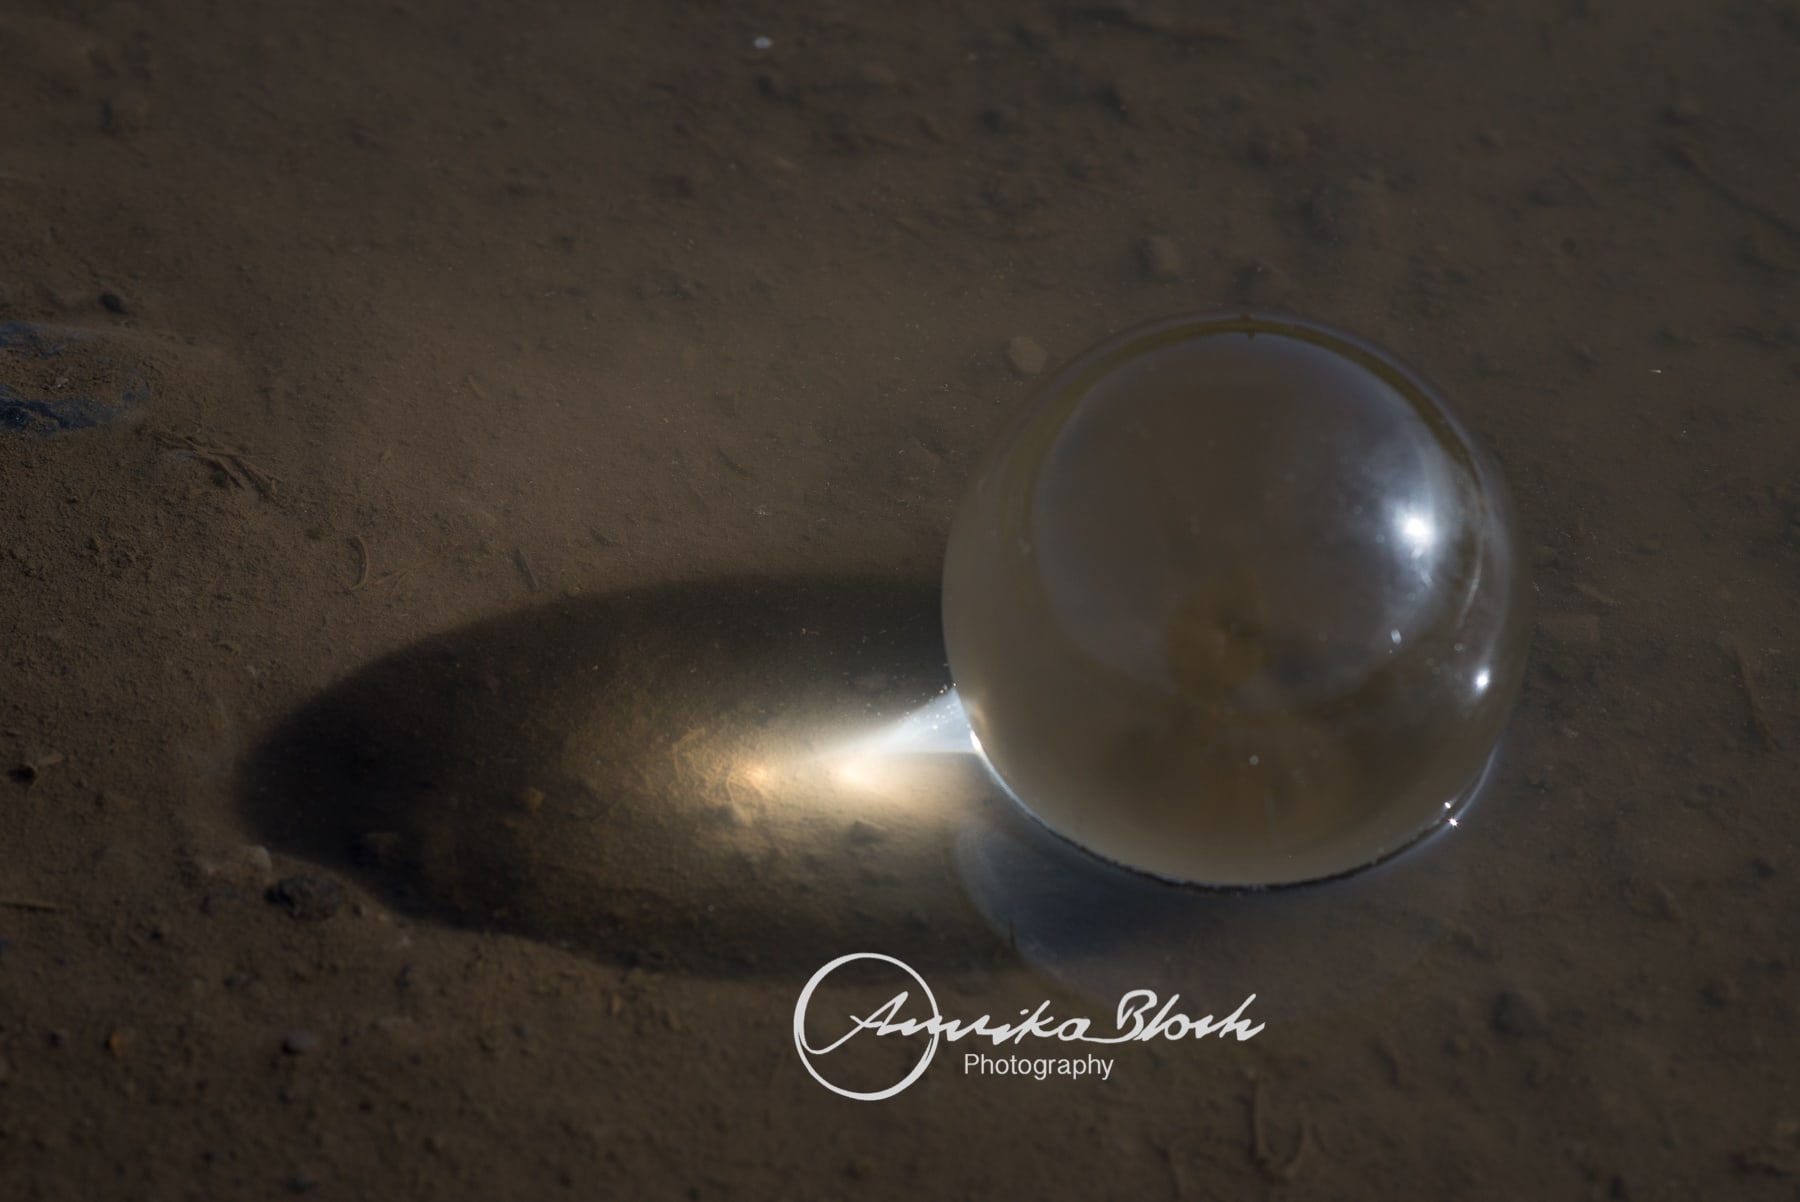
Of course the shape of the ball itself can be interesting, especially in an environment where it seems alien. Also, the light shining through can give some beautiful effects.
But that’s not what I wanted. I asked me husband to hold the ball so I could shoot through it at eye level. He was keen to go out surfing, so I had to hurry…
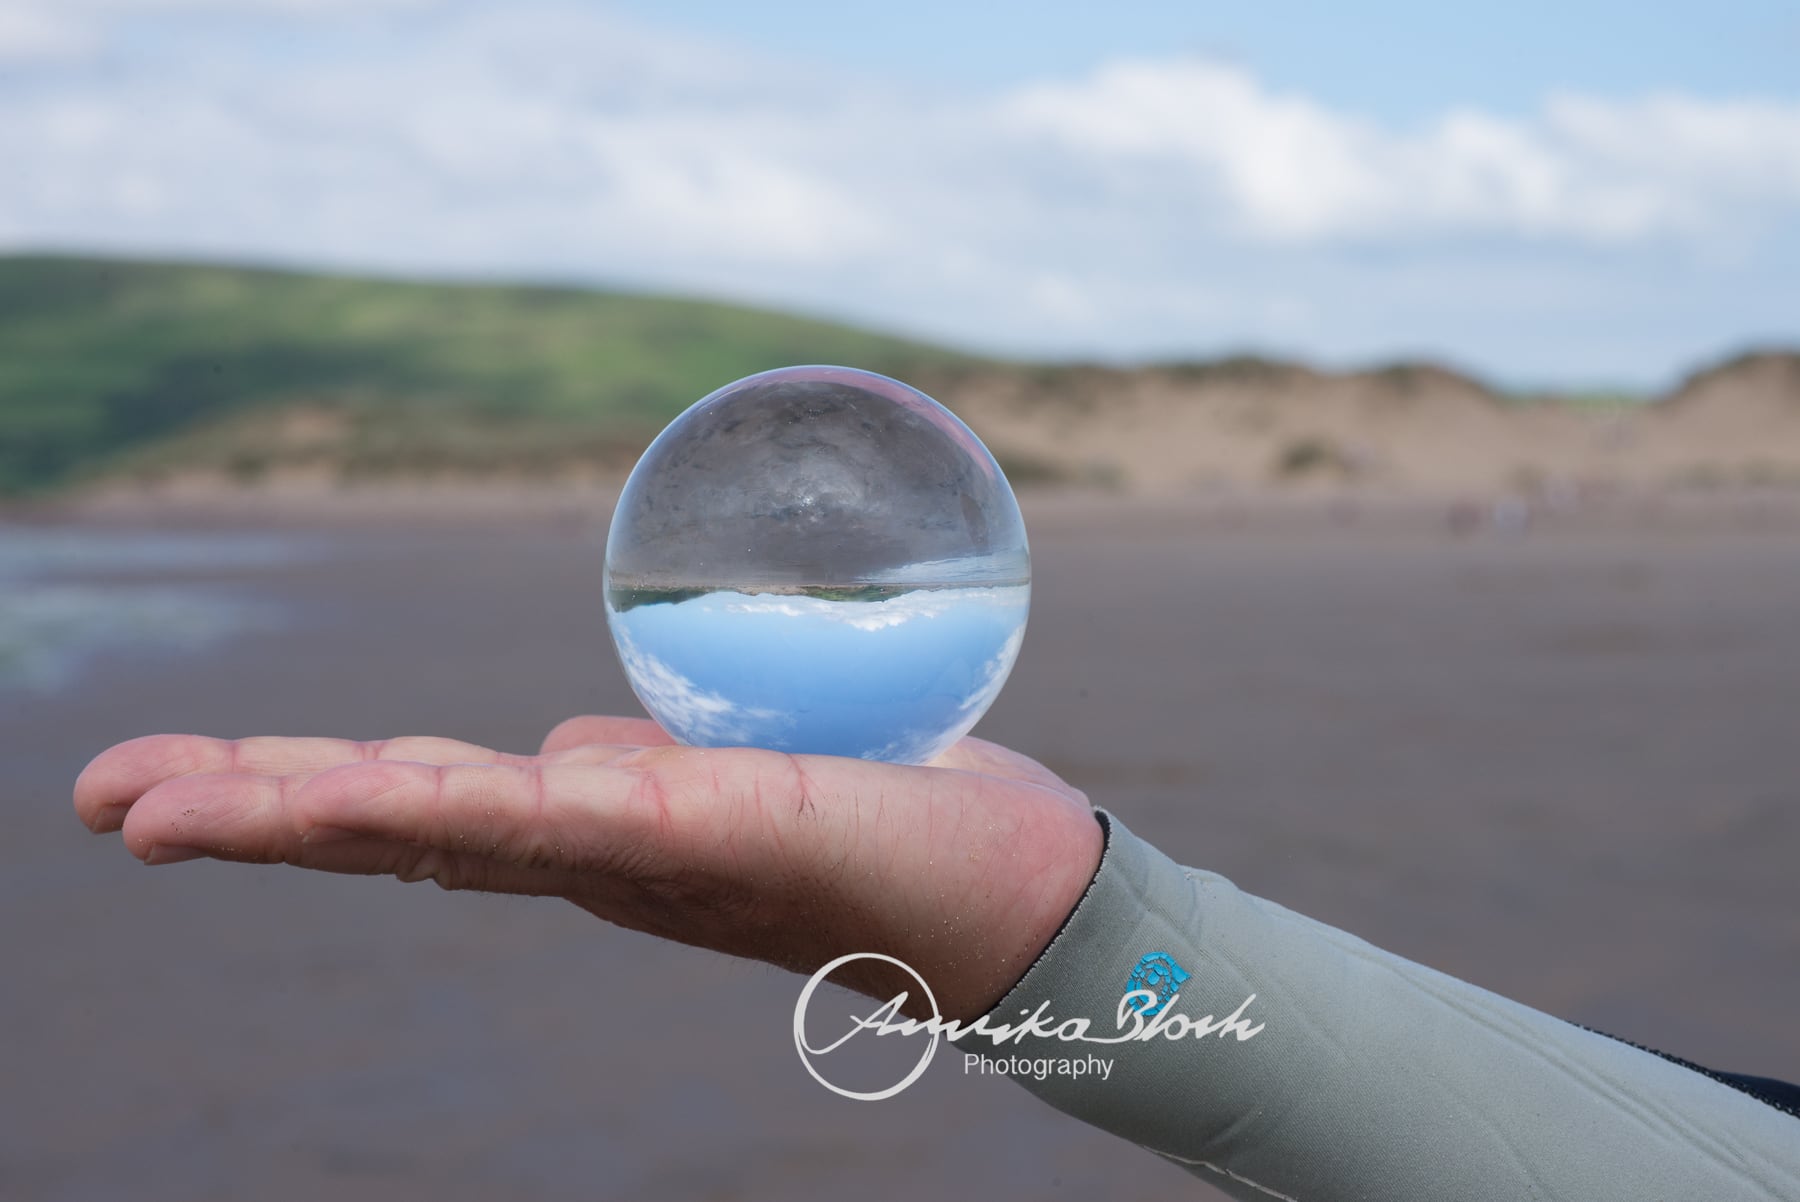
You can see the image upside down. I wasn’t too keen on those images, they seemed boring.
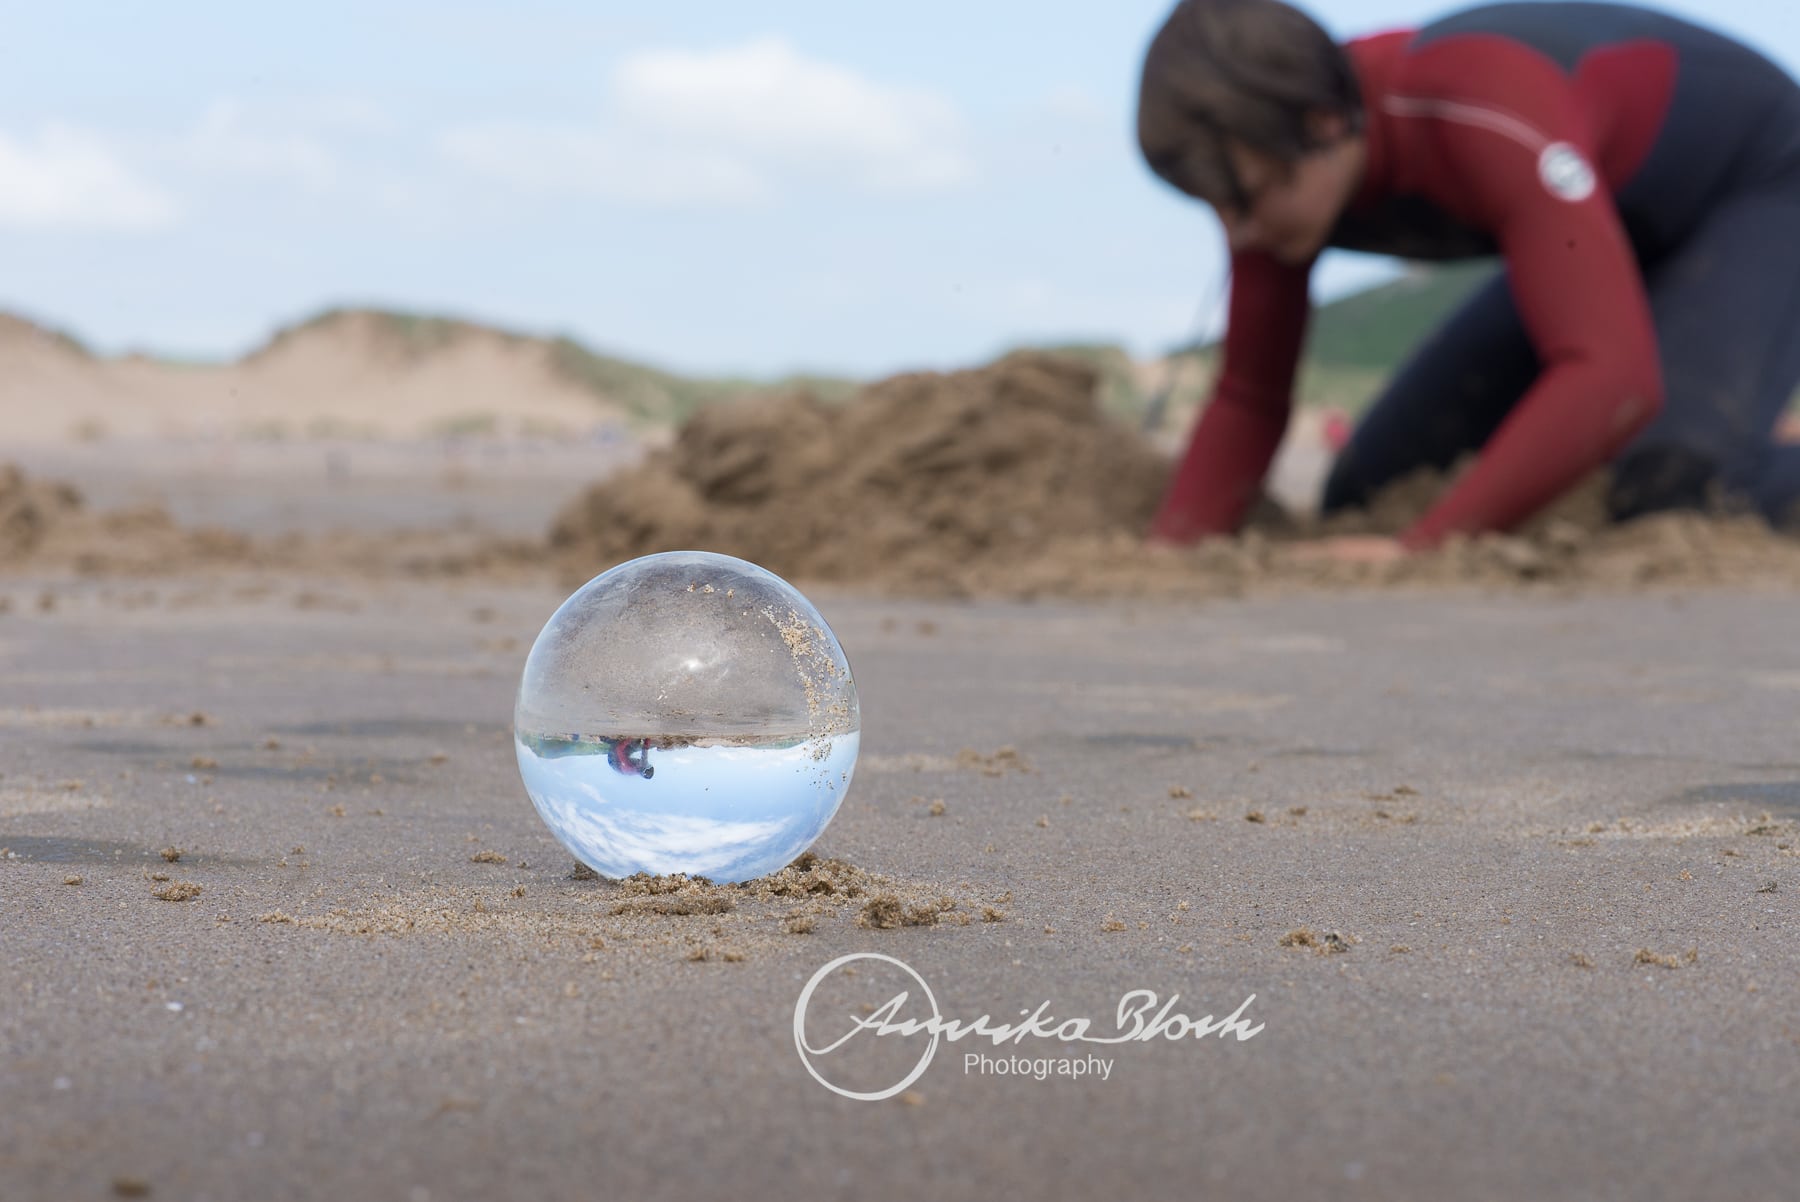

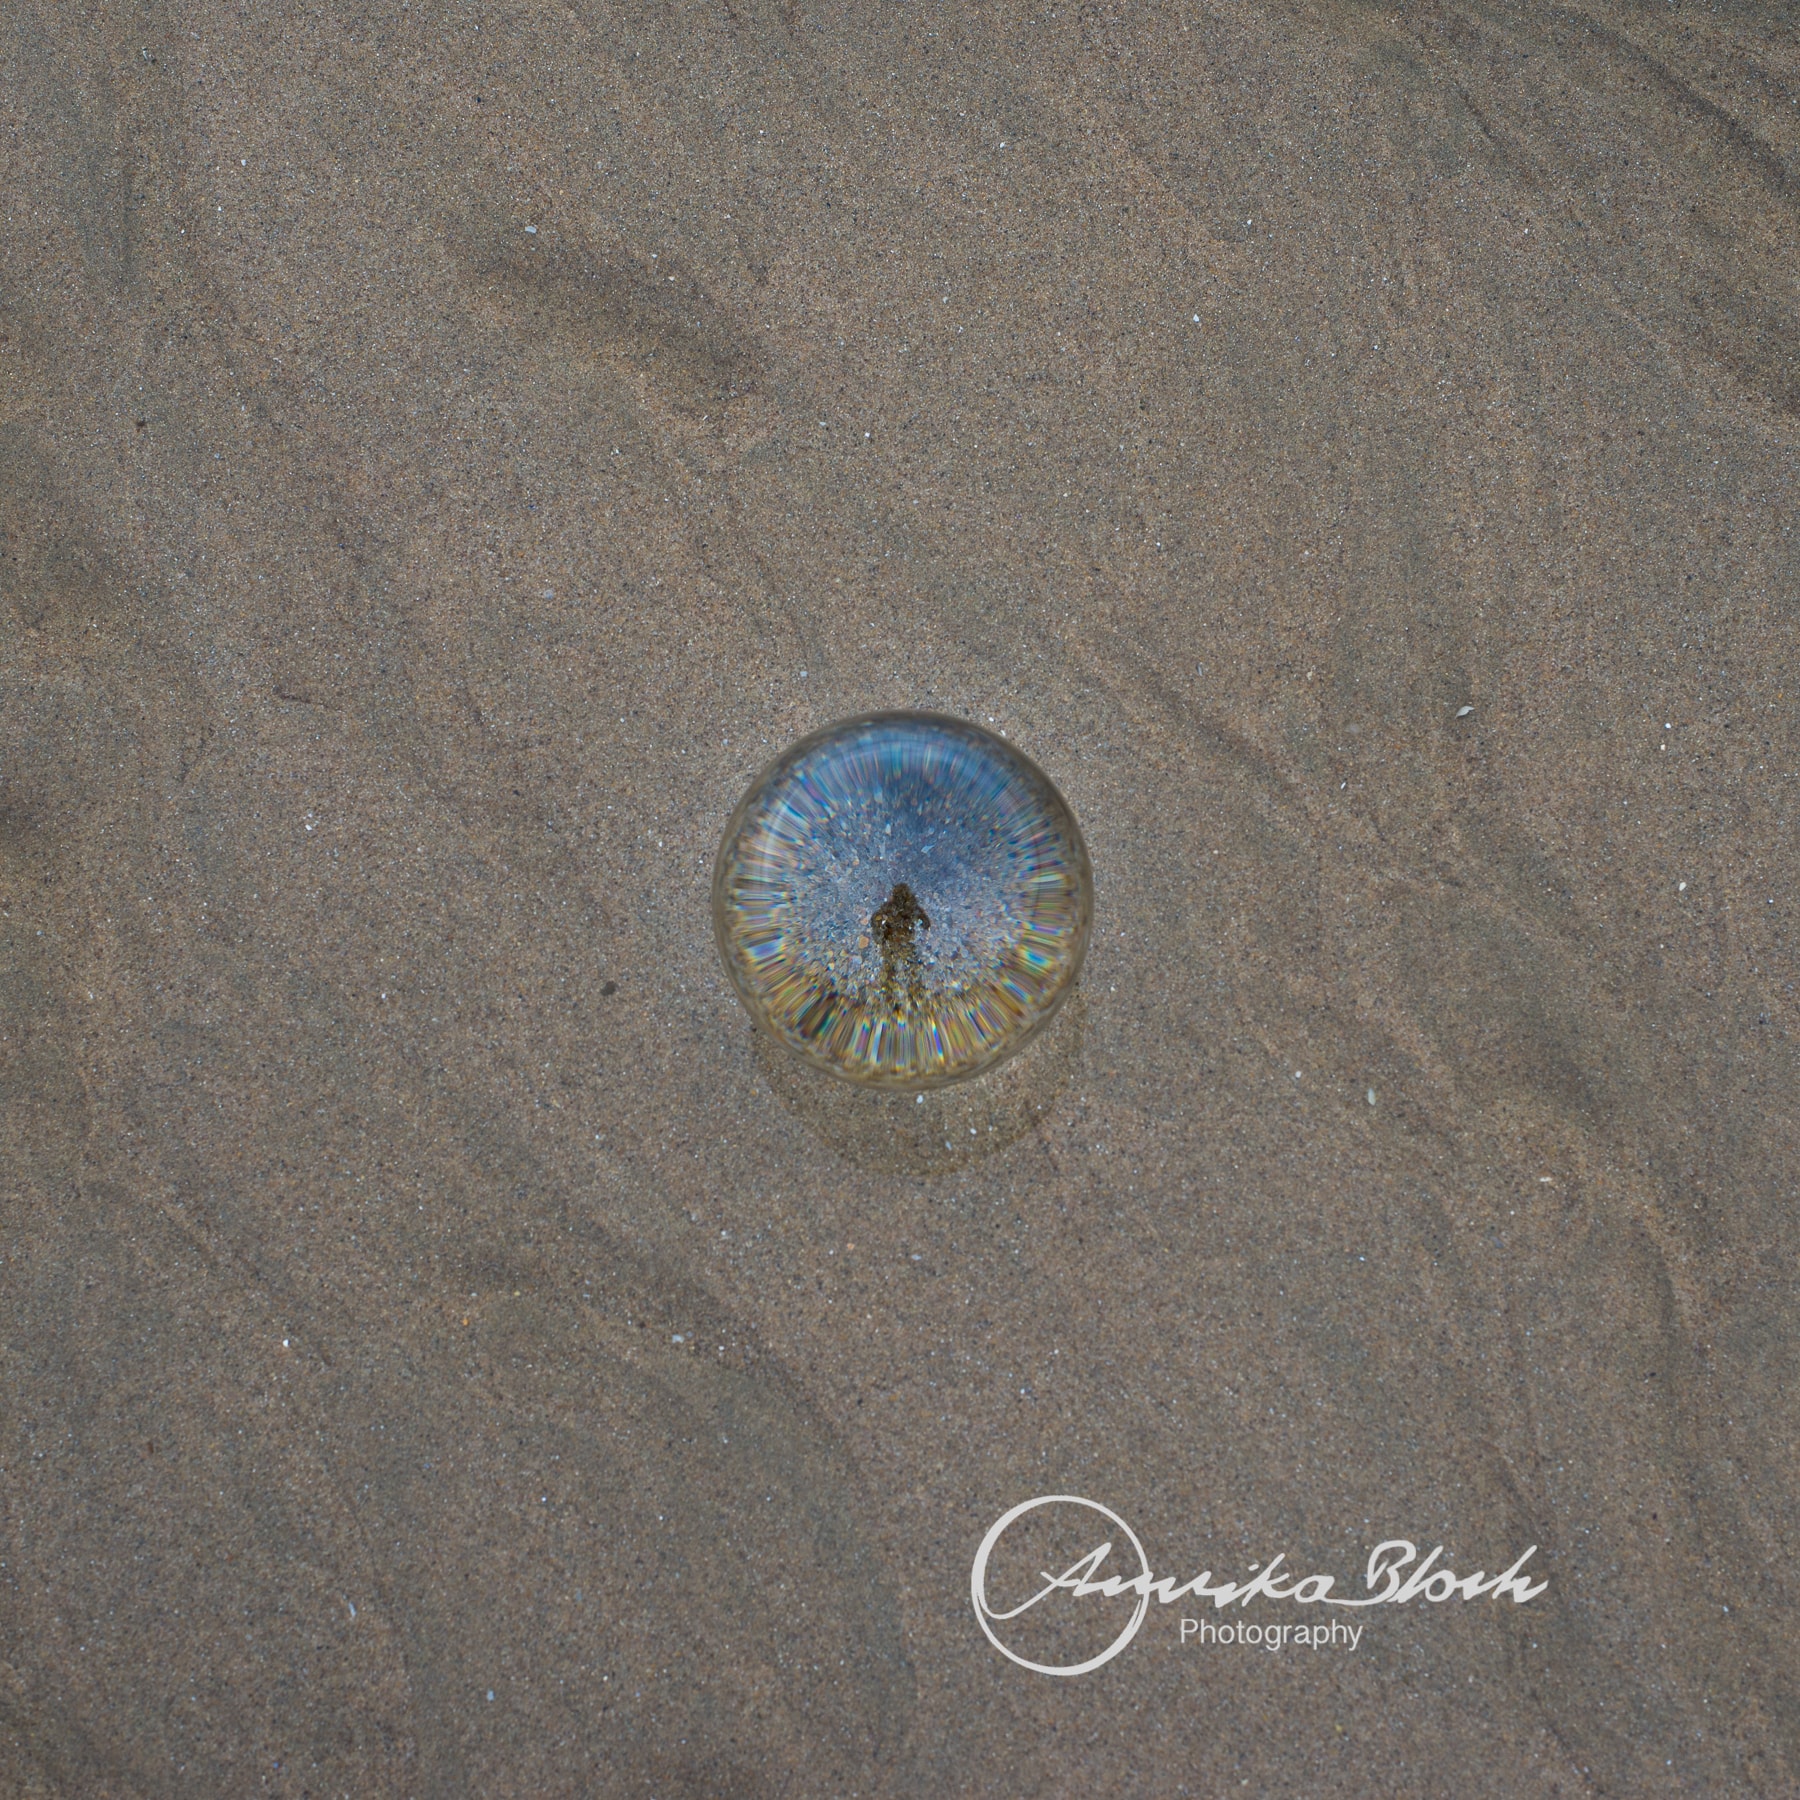
Next I placed the ball on the sand to see the effect. I had to crouch really low to shoot at the right level. Better. The image inside the crystal ball was obviously still upside down, but in the image with my son, for example, I like it, because his shape in the background does give it some context.
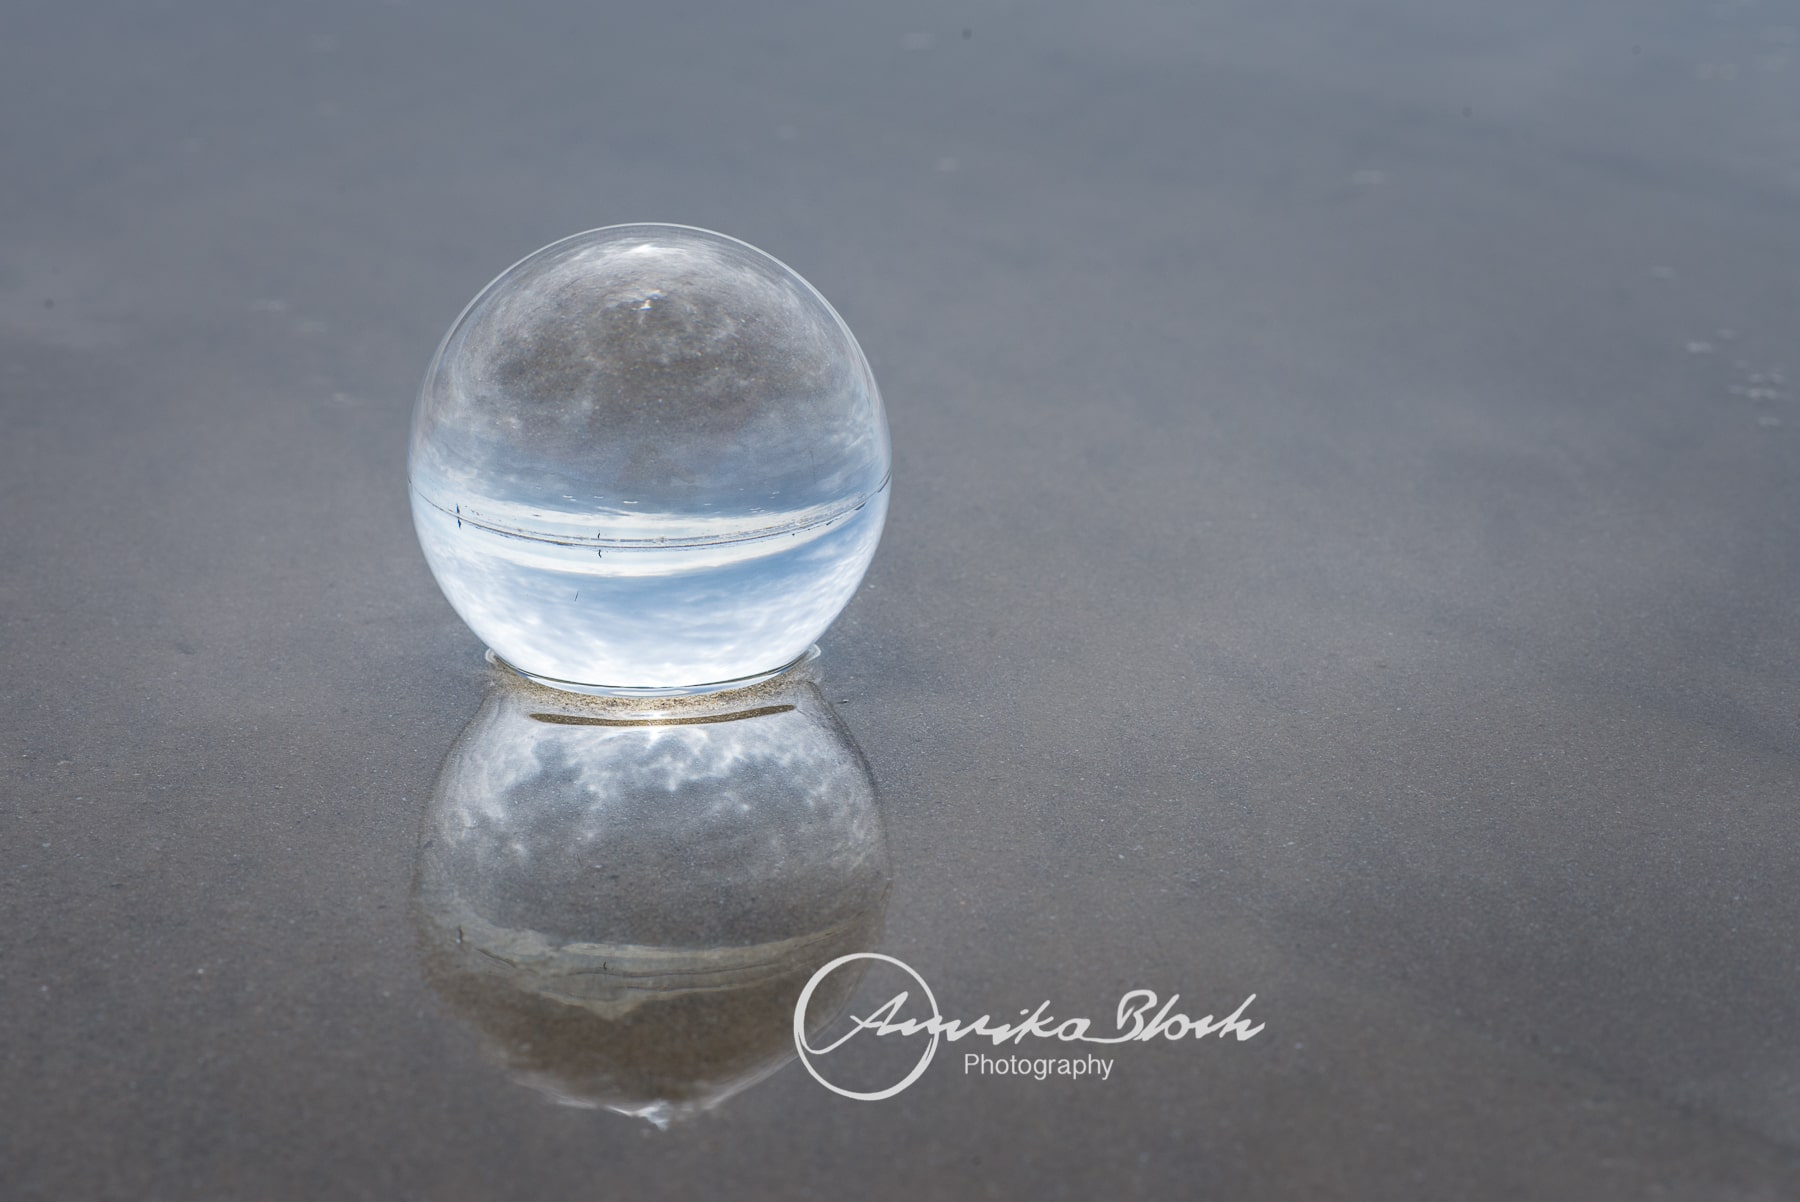

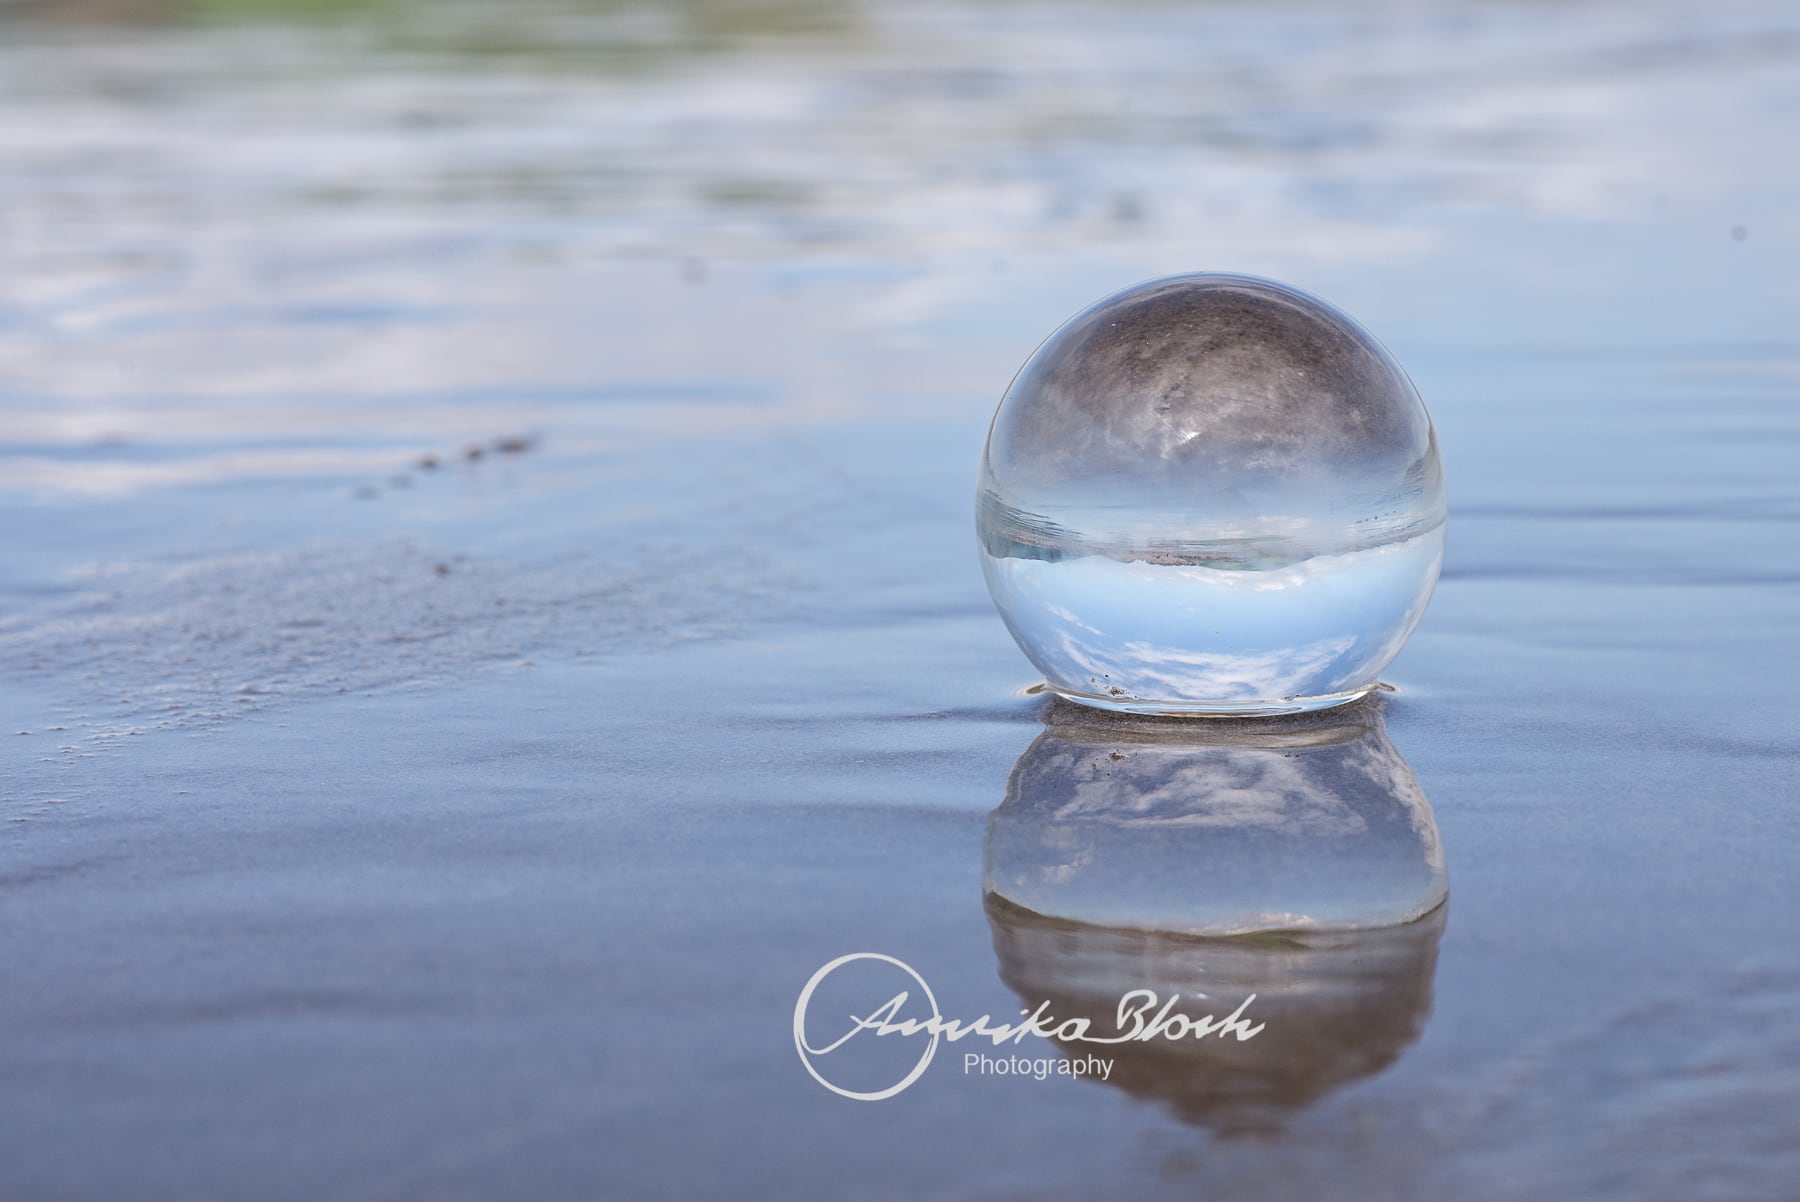
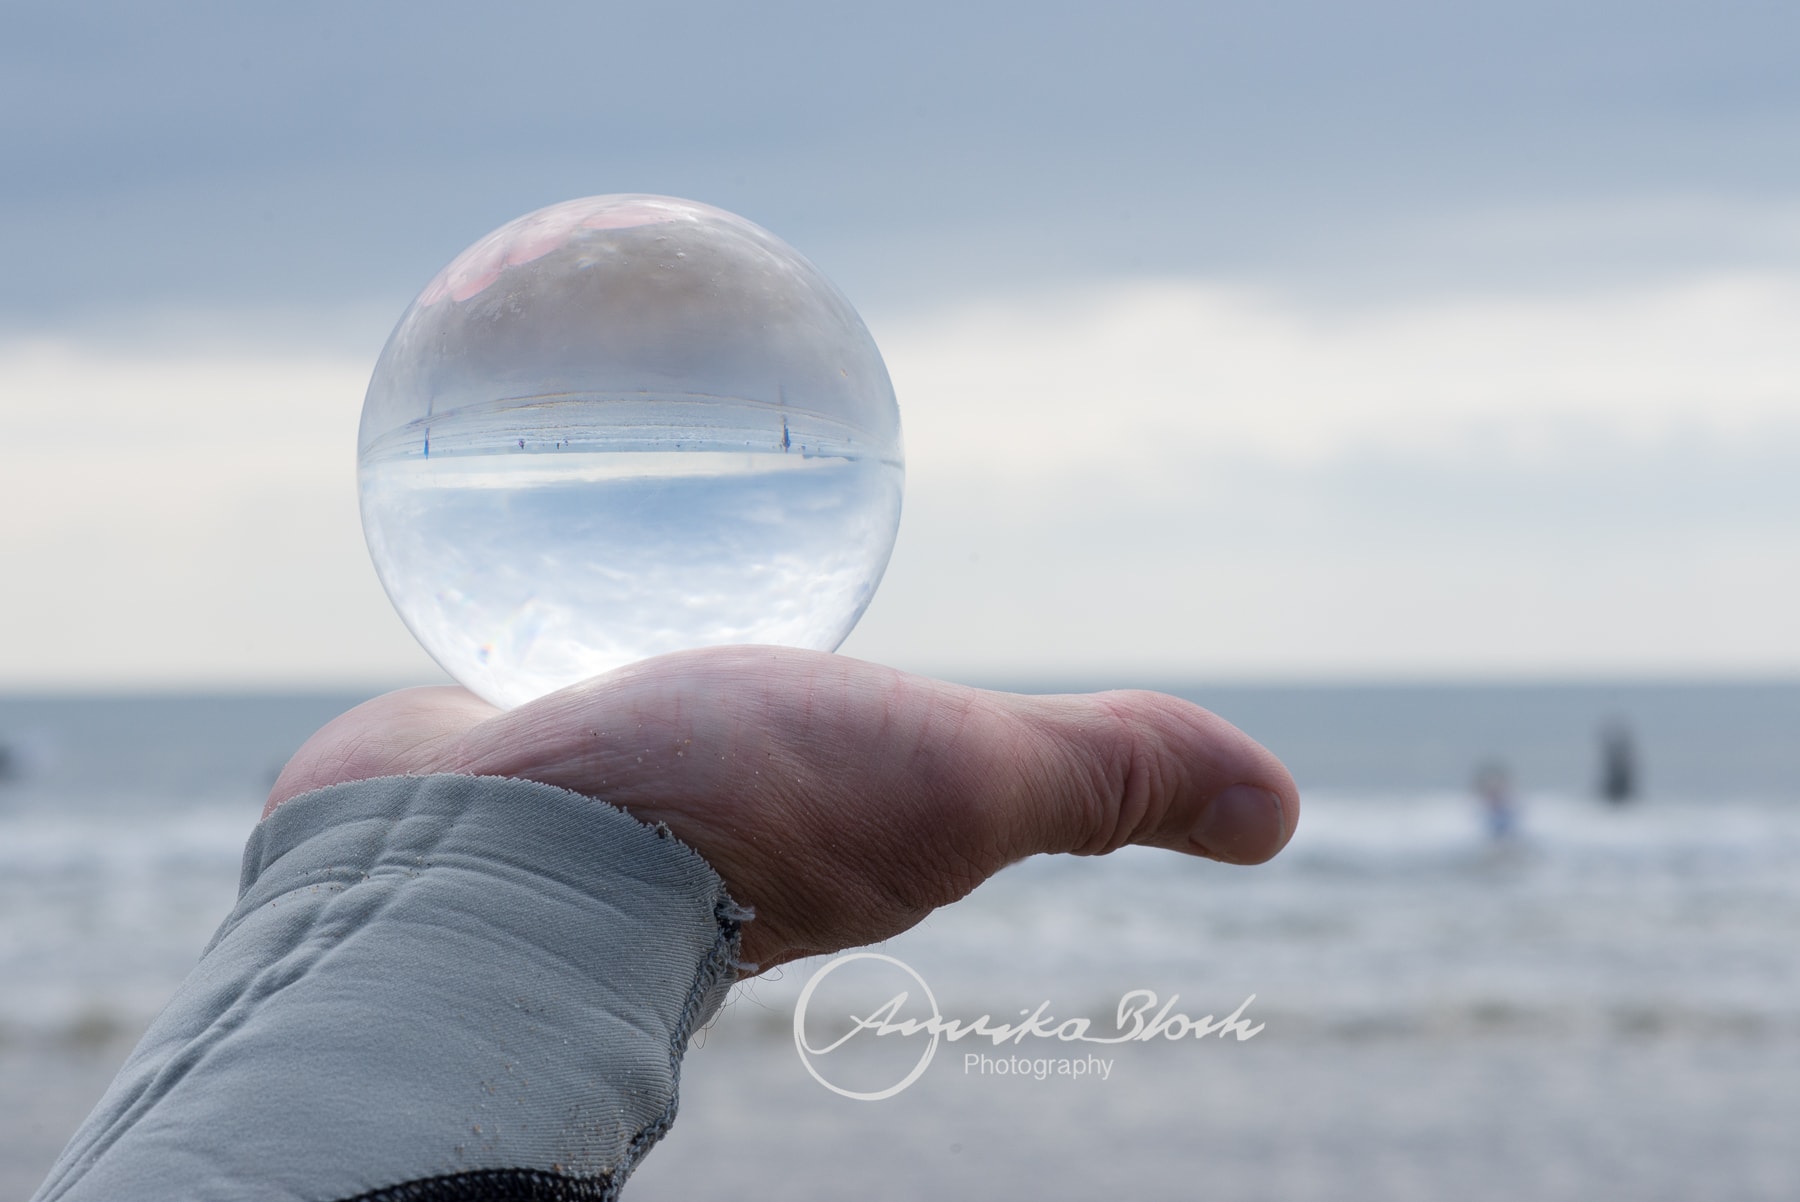
I like those a lot better. Partly, because I love the blues of sea and sky but mainly because the ball already contains the reflection of the image in the water AND the water shows the reflection of the crystal ball. With so many reflections, it doesn’t really matter what is upside down and what isn’t. Another thing I learned from these images is that you want to keep your crystal ball really, really clean. I wiped the water off when it was wet, but the salt water and sand left marks that were very obvious on the final image. Oh well…

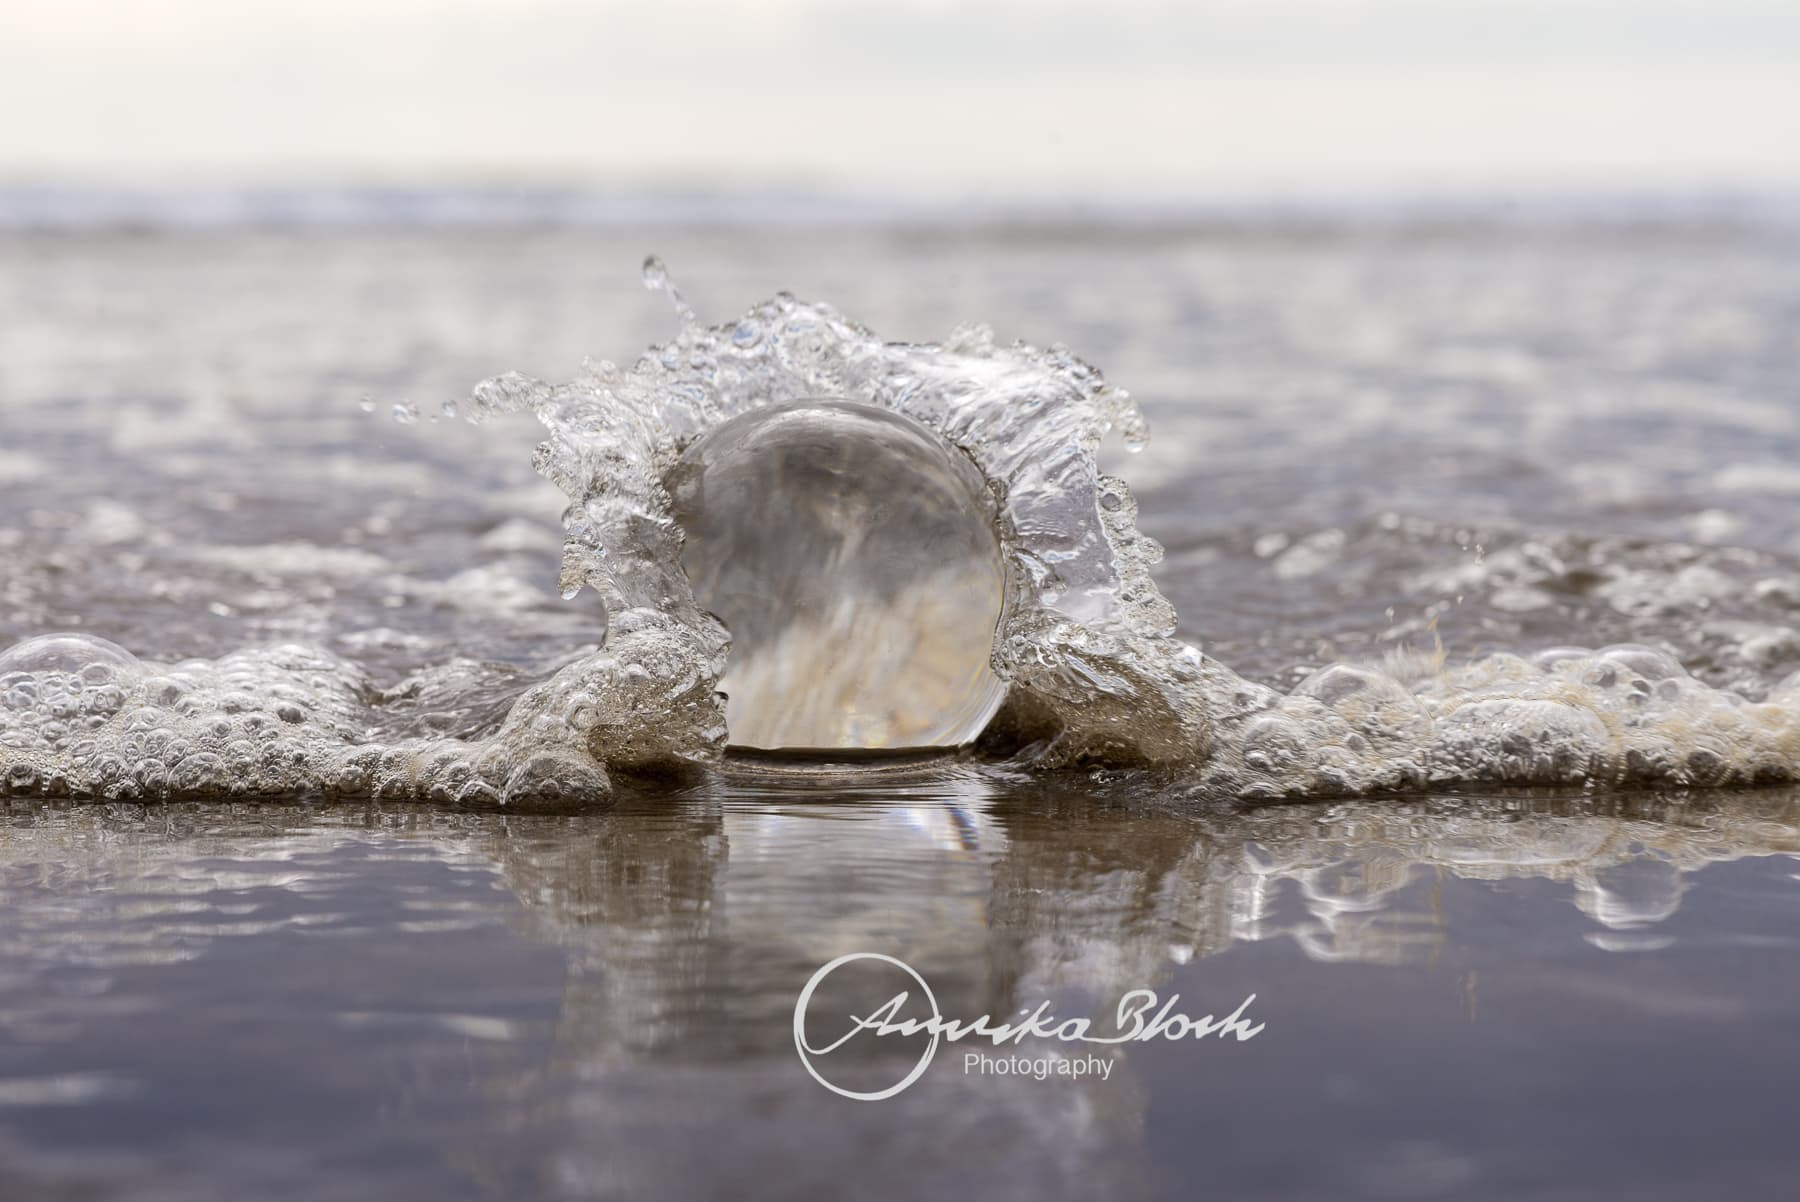
I can tell I had to watch the waves with these images. Luckily, the ball was too heavy to be swept away easily, but it was regularly submerged. And me too. Almost. I did get quite wet because I was so low and mainly took care not to flood my camera. Anything for the art, right?
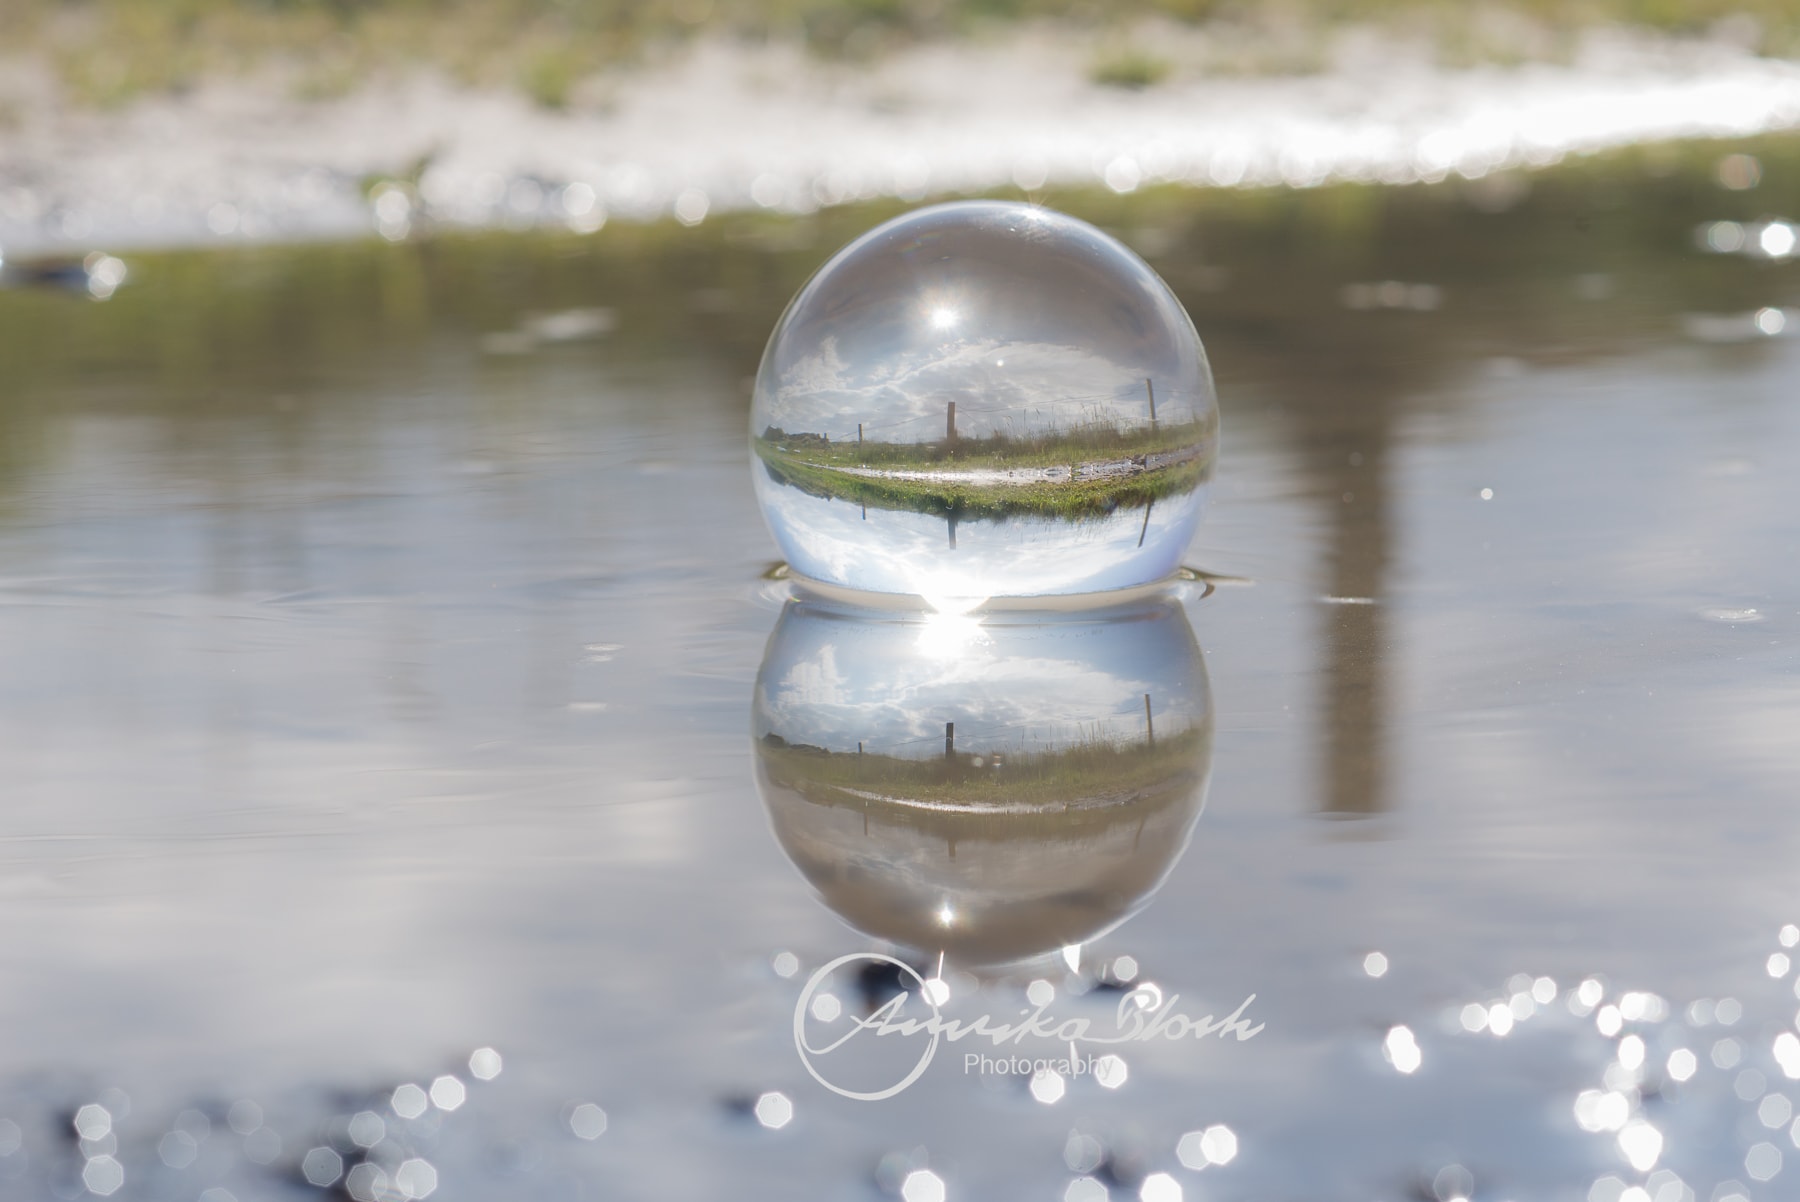
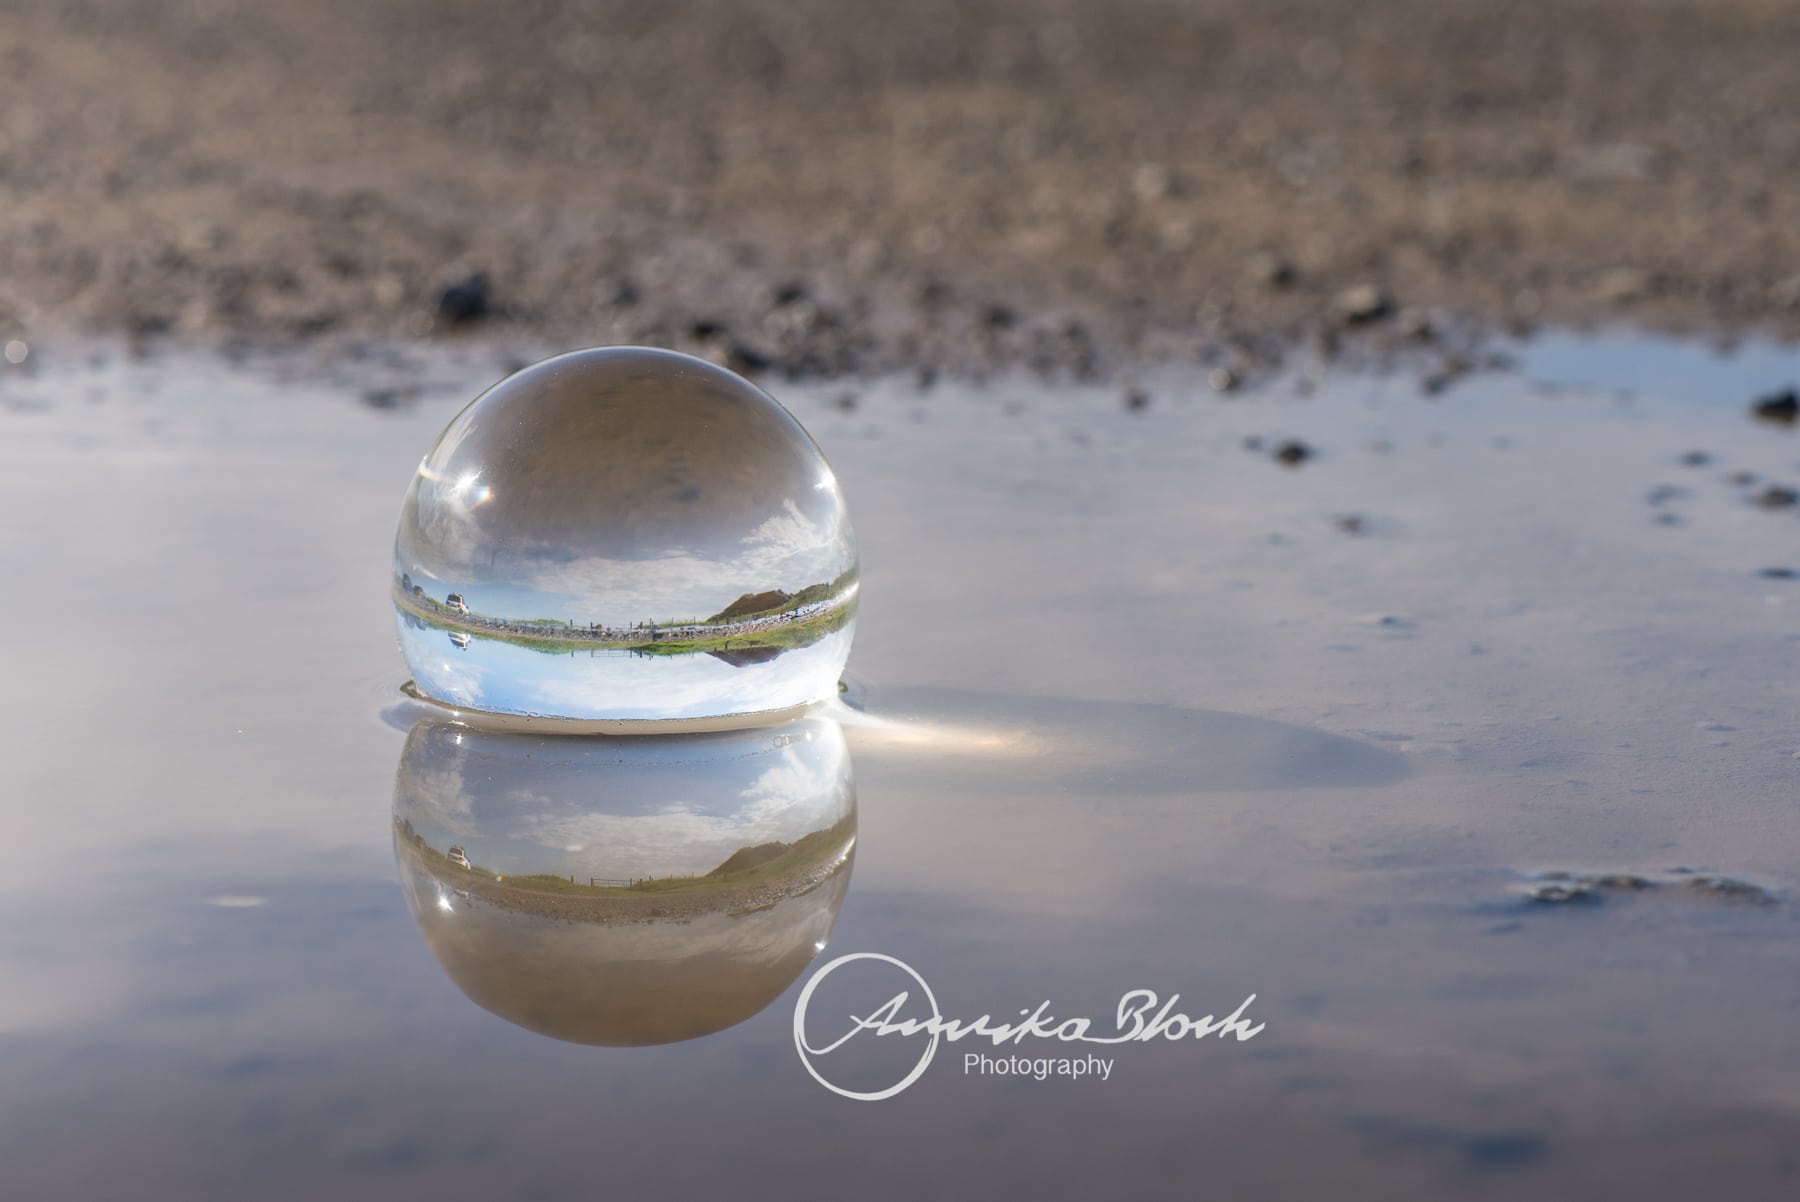
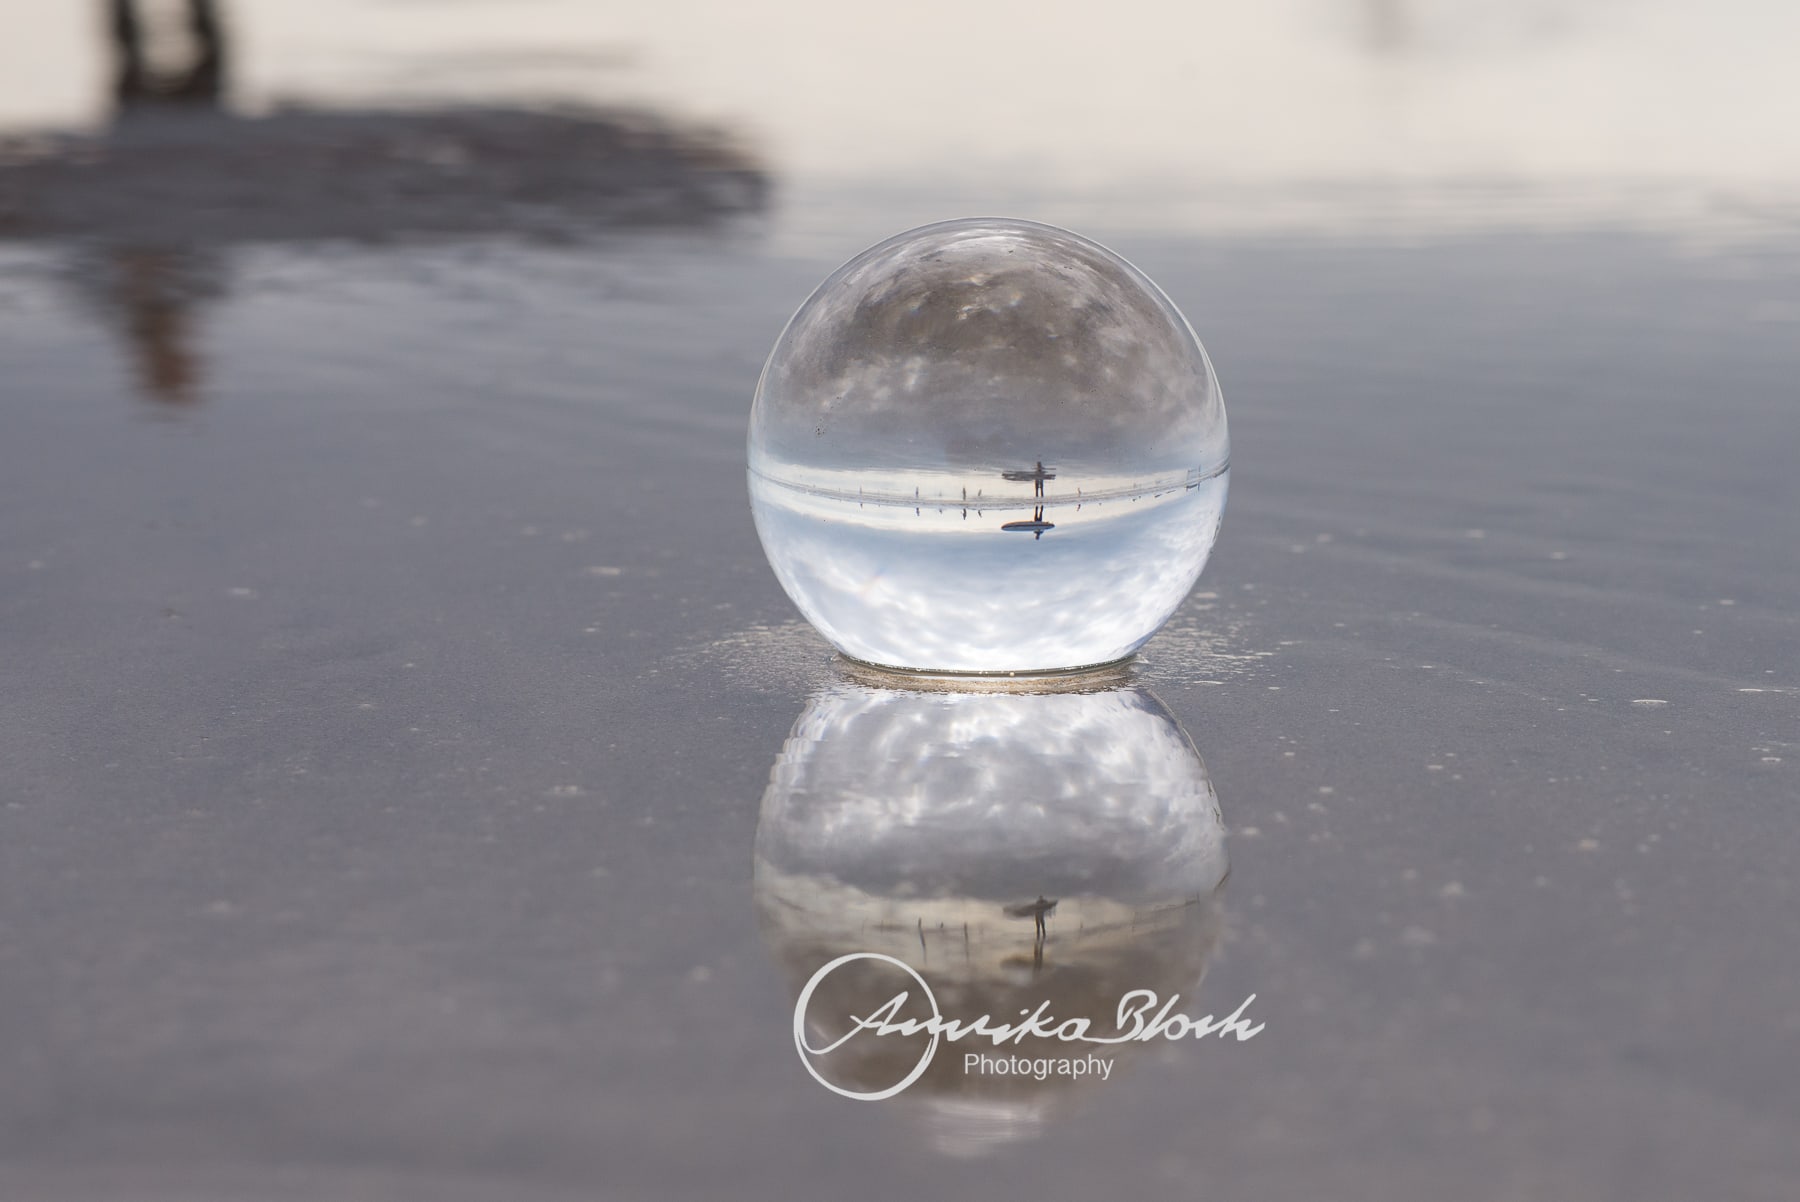
And those last two images, which I really like for various reasons were taken on the way back to the tent, in a muddy puddle on a parking lot. Admittedly, a muddy puddle on a parking lot between grassy fields and sandy dunes but the puddle really didn’t look like much. Which shows that beauty can be found in unexpected places.
So which of my crystal ball images from this session do you like best? If you go the June meeting of the Queens Park Photo Group you can see which one they liked best.